
Welcome to the Augmenta Designer !
Before installing your equipment, you need to know how many sensors and servers are required, and which models to use.
This step is usually handled by a technical director, scenographer, AV integrator, or technical study specialist.
To make this process faster and simpler, we provide a free tool
Once you’re ready, or if you have any questions, reach out and let’s take your project to the next level ! ➡️ contact us
The Designer is not a full replacement for a professional AV study for complex setup.
It does not contain every supported sensor or advanced design feature and has limitations.
➡️ However, for most standard projects and rooms, it covers a majority of use cases and saves a lot of time.
Quick start
- Go to Augmenta designer
- Select the type of interactivity you want
- Enter your room dimensions then select a sensor
- Share the project link with your team
Step-by-step tutorial
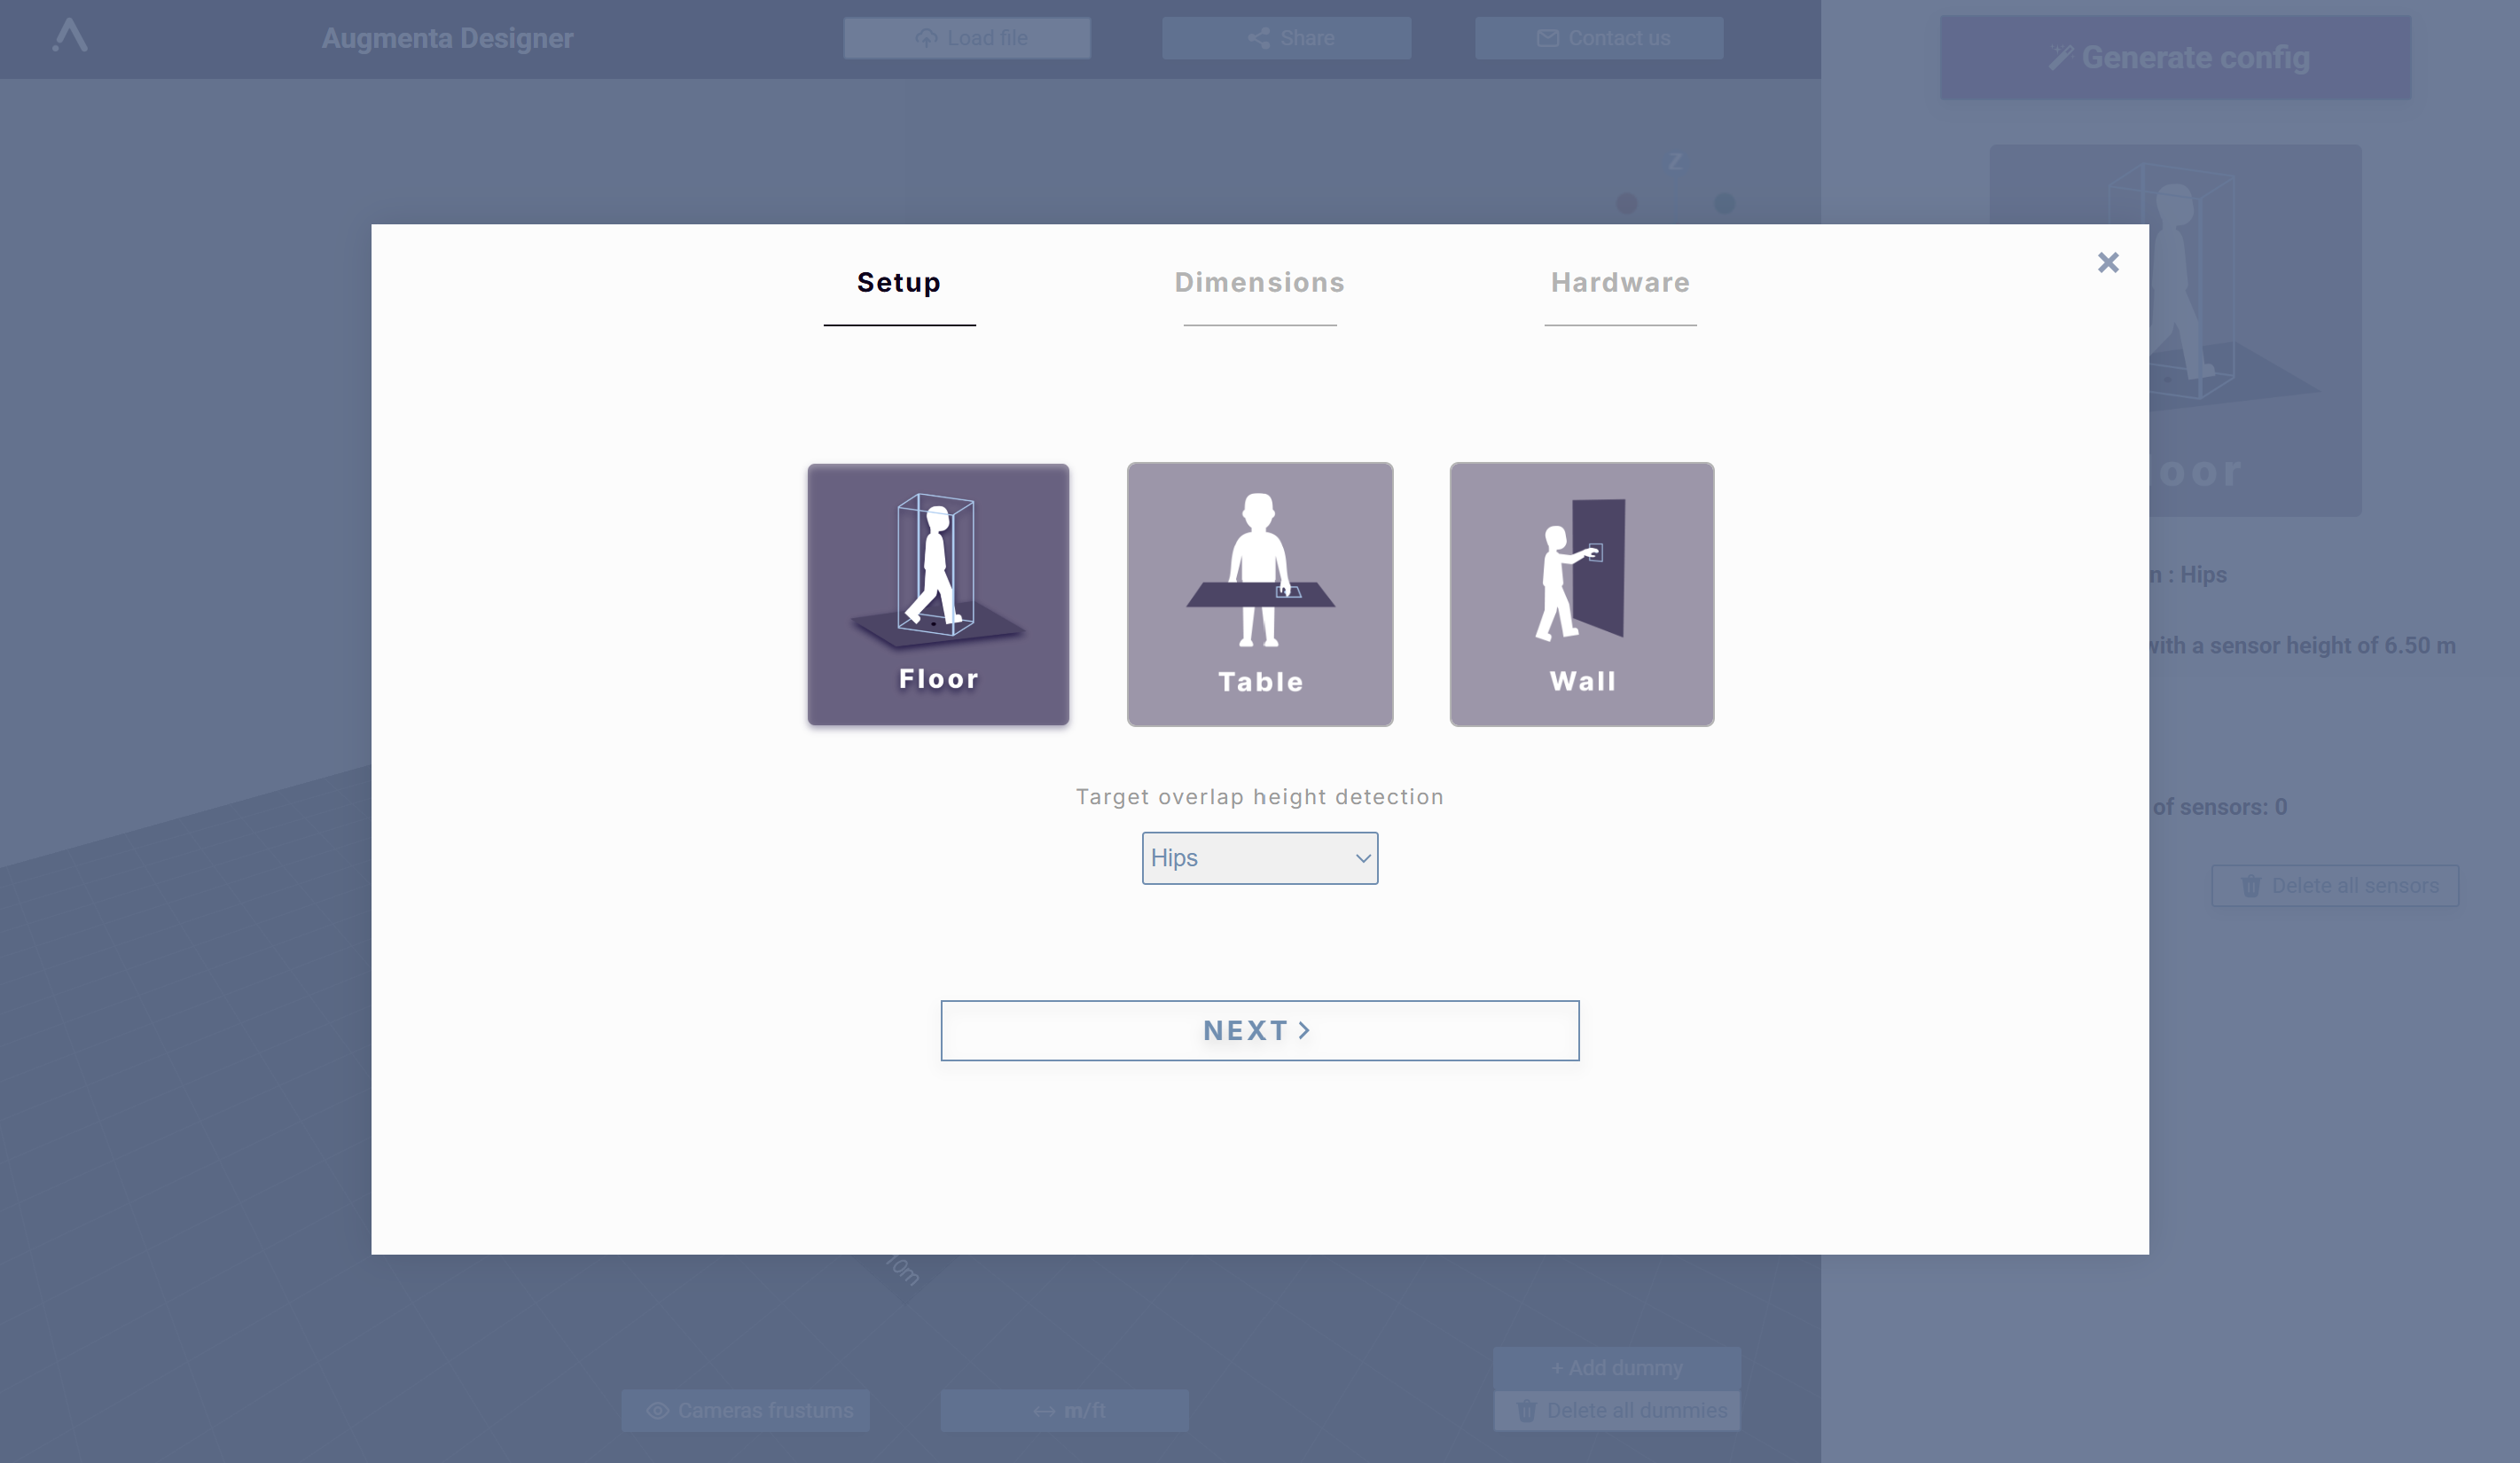
1. Choose your interaction mode
Select the type of interactivity you’d like to simulate (e.g., people tracking)
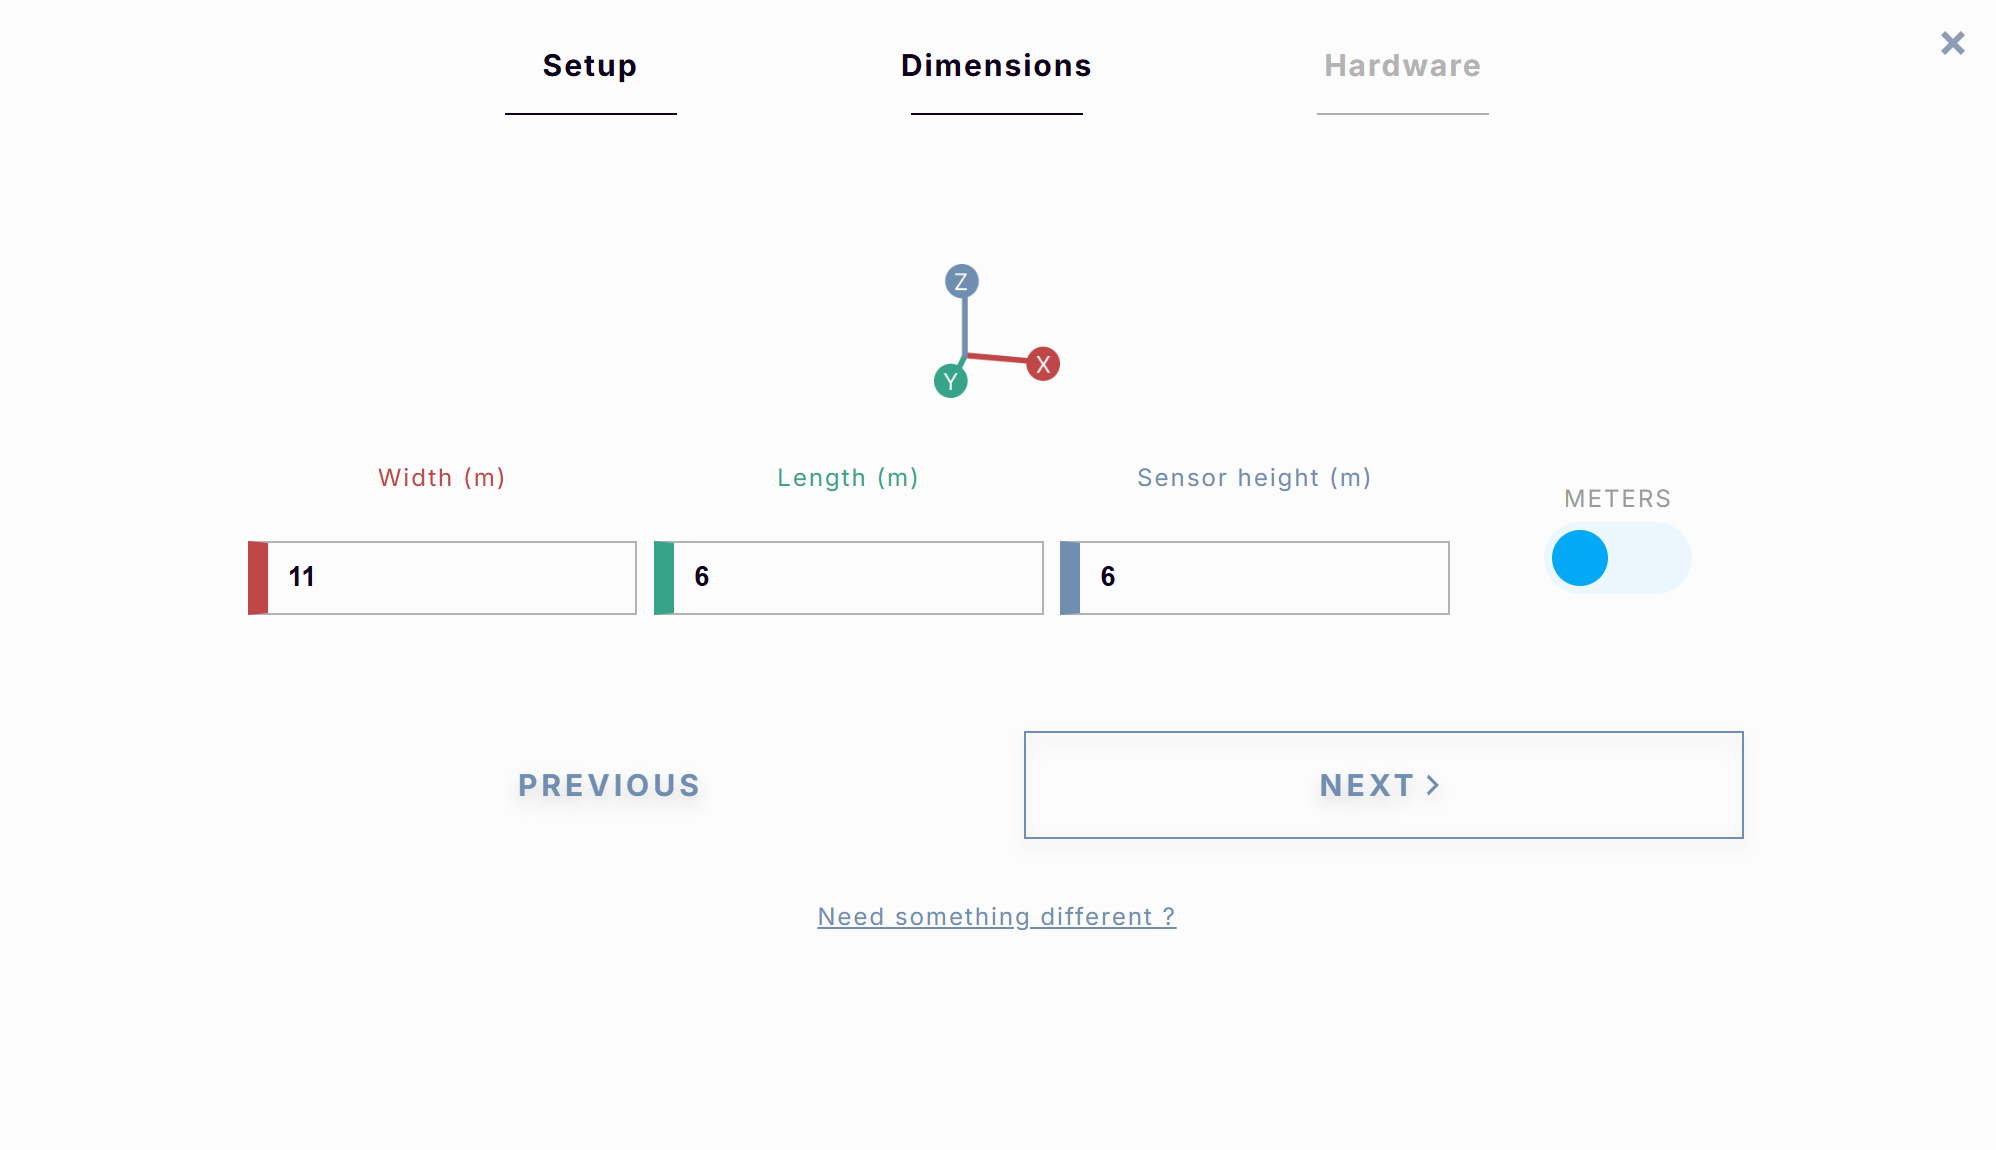
2. Enter room dimensions
Type in the length, width, and height of your space
3. Select a sensor
Every sensor has a different Field of View (FOV), so placement and orientation should be checked carefully for optimal coverage.

You can also select whether your setup is indoor or outdoor, which adjusts the sensors accordingly (e.g., outdoor sensors are IP67-rated for weather protection).
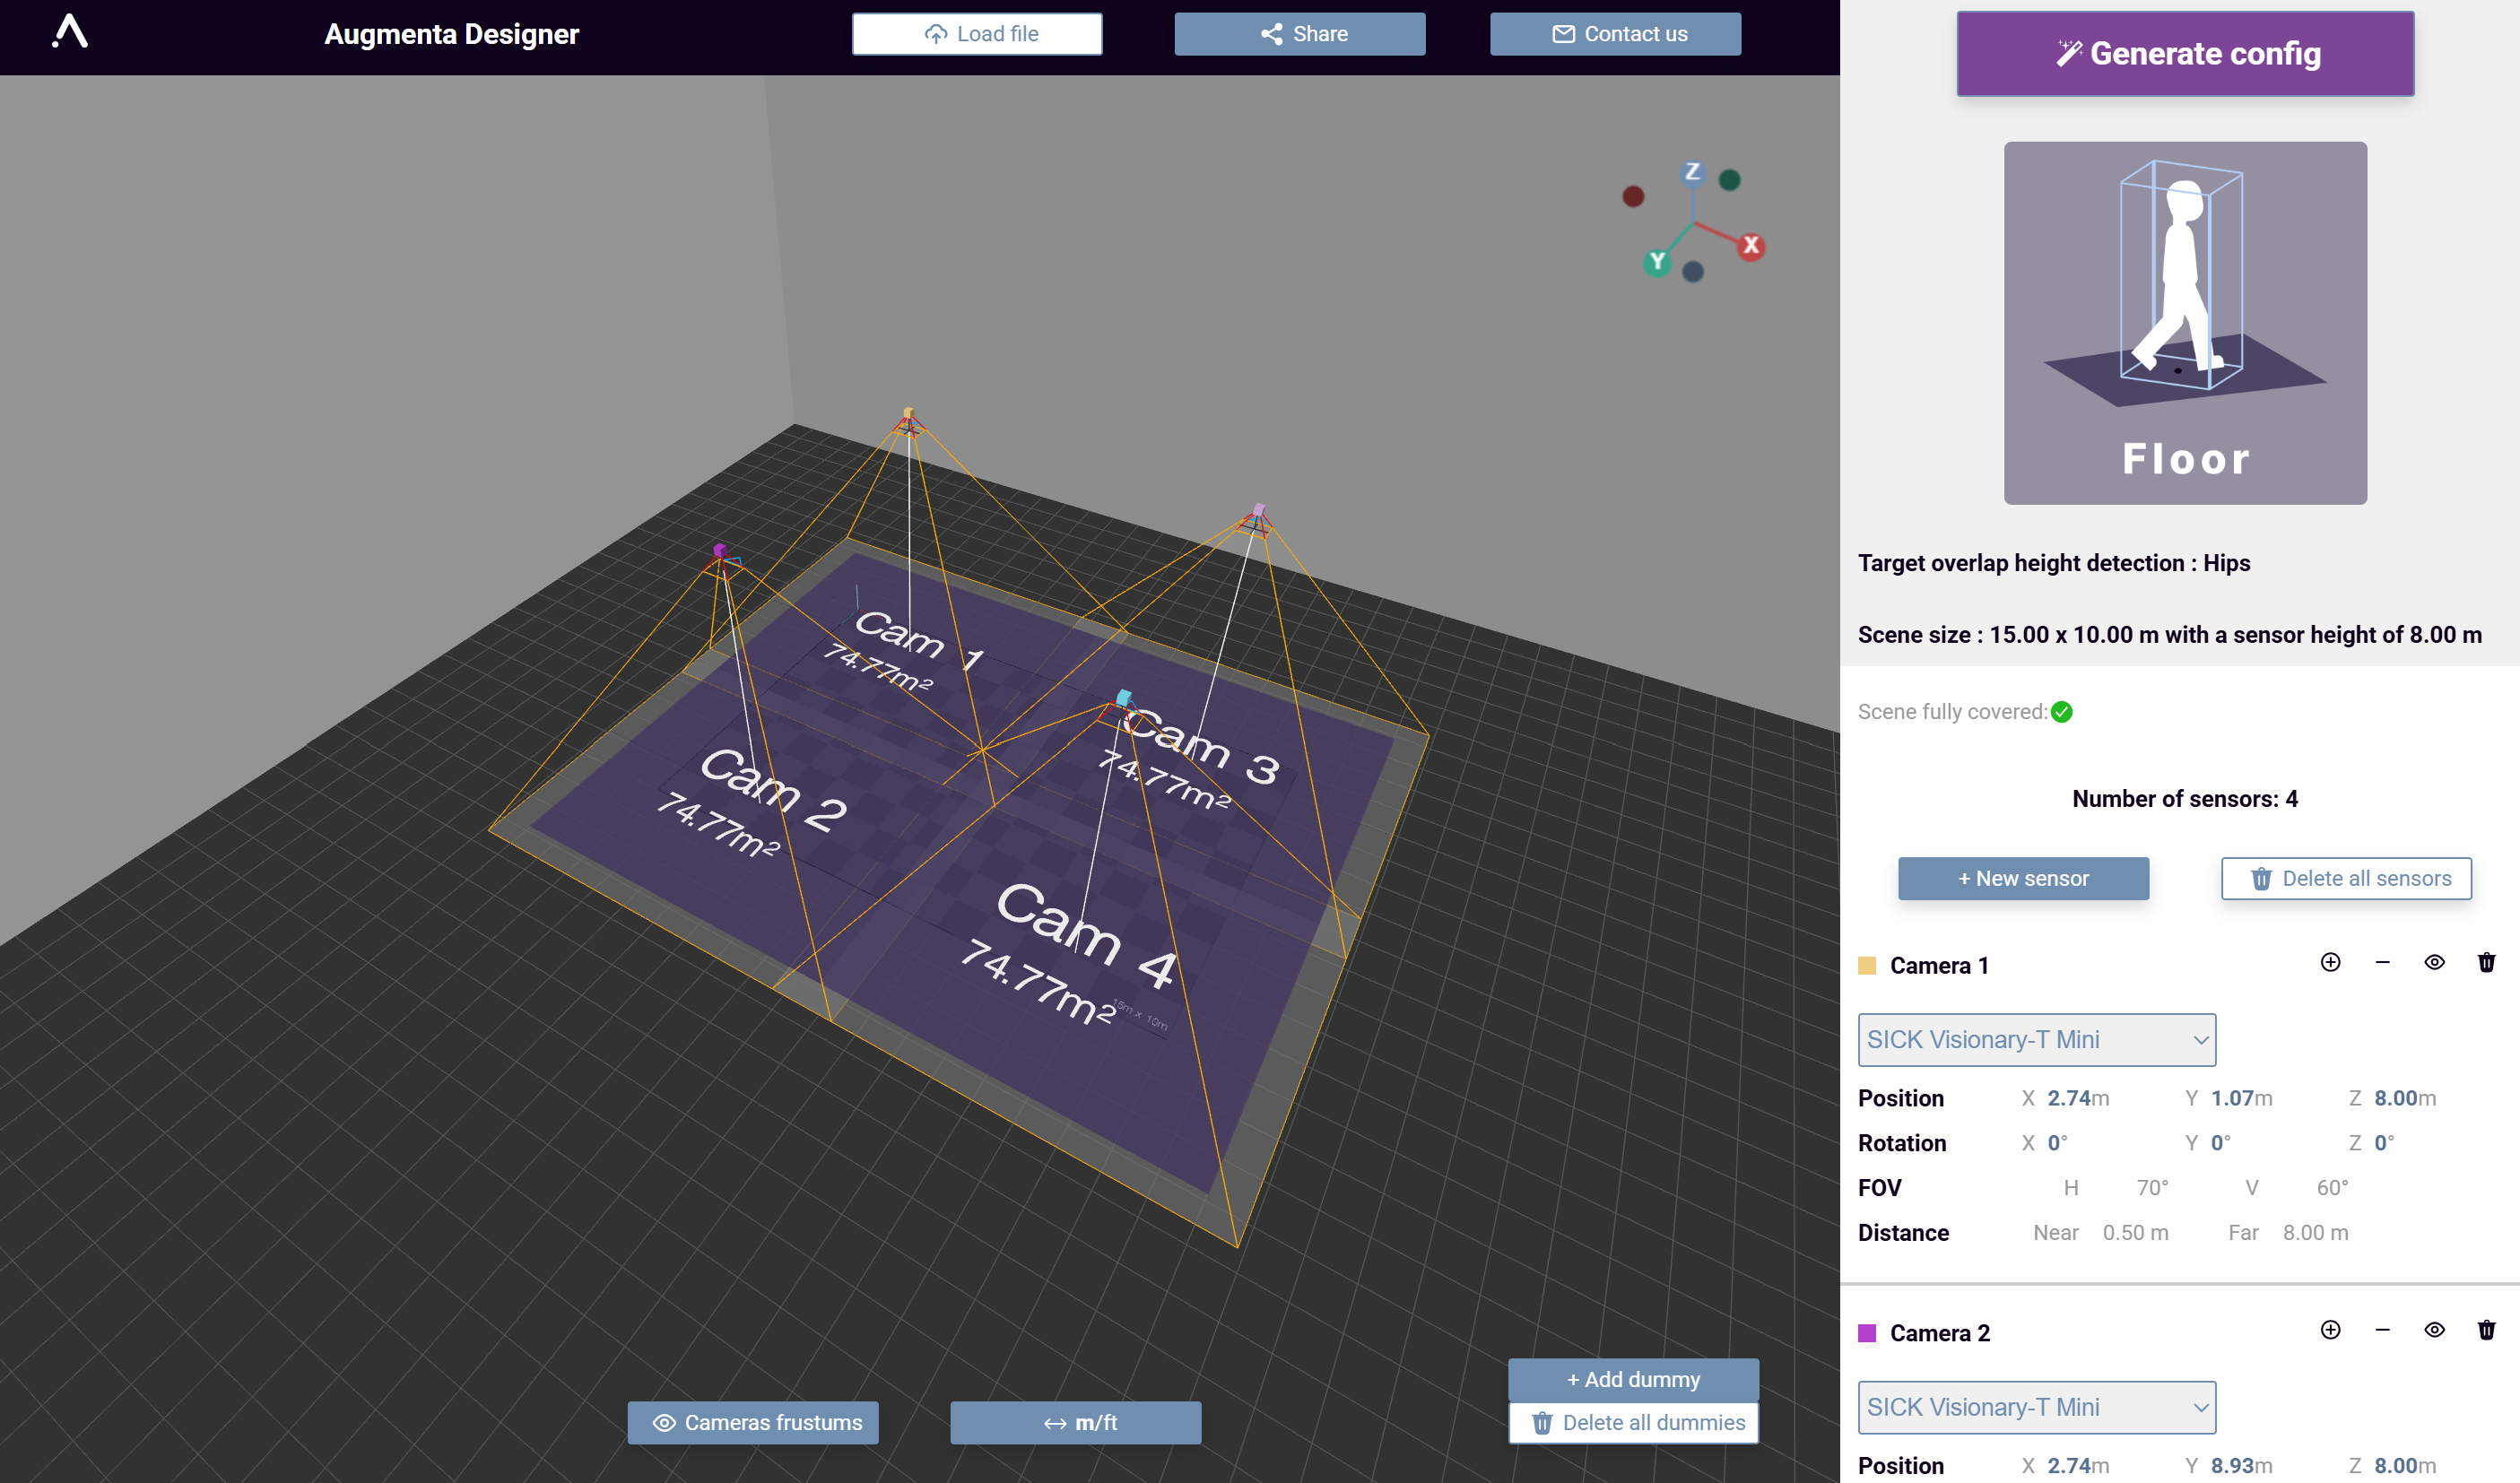
4. Place your sensors
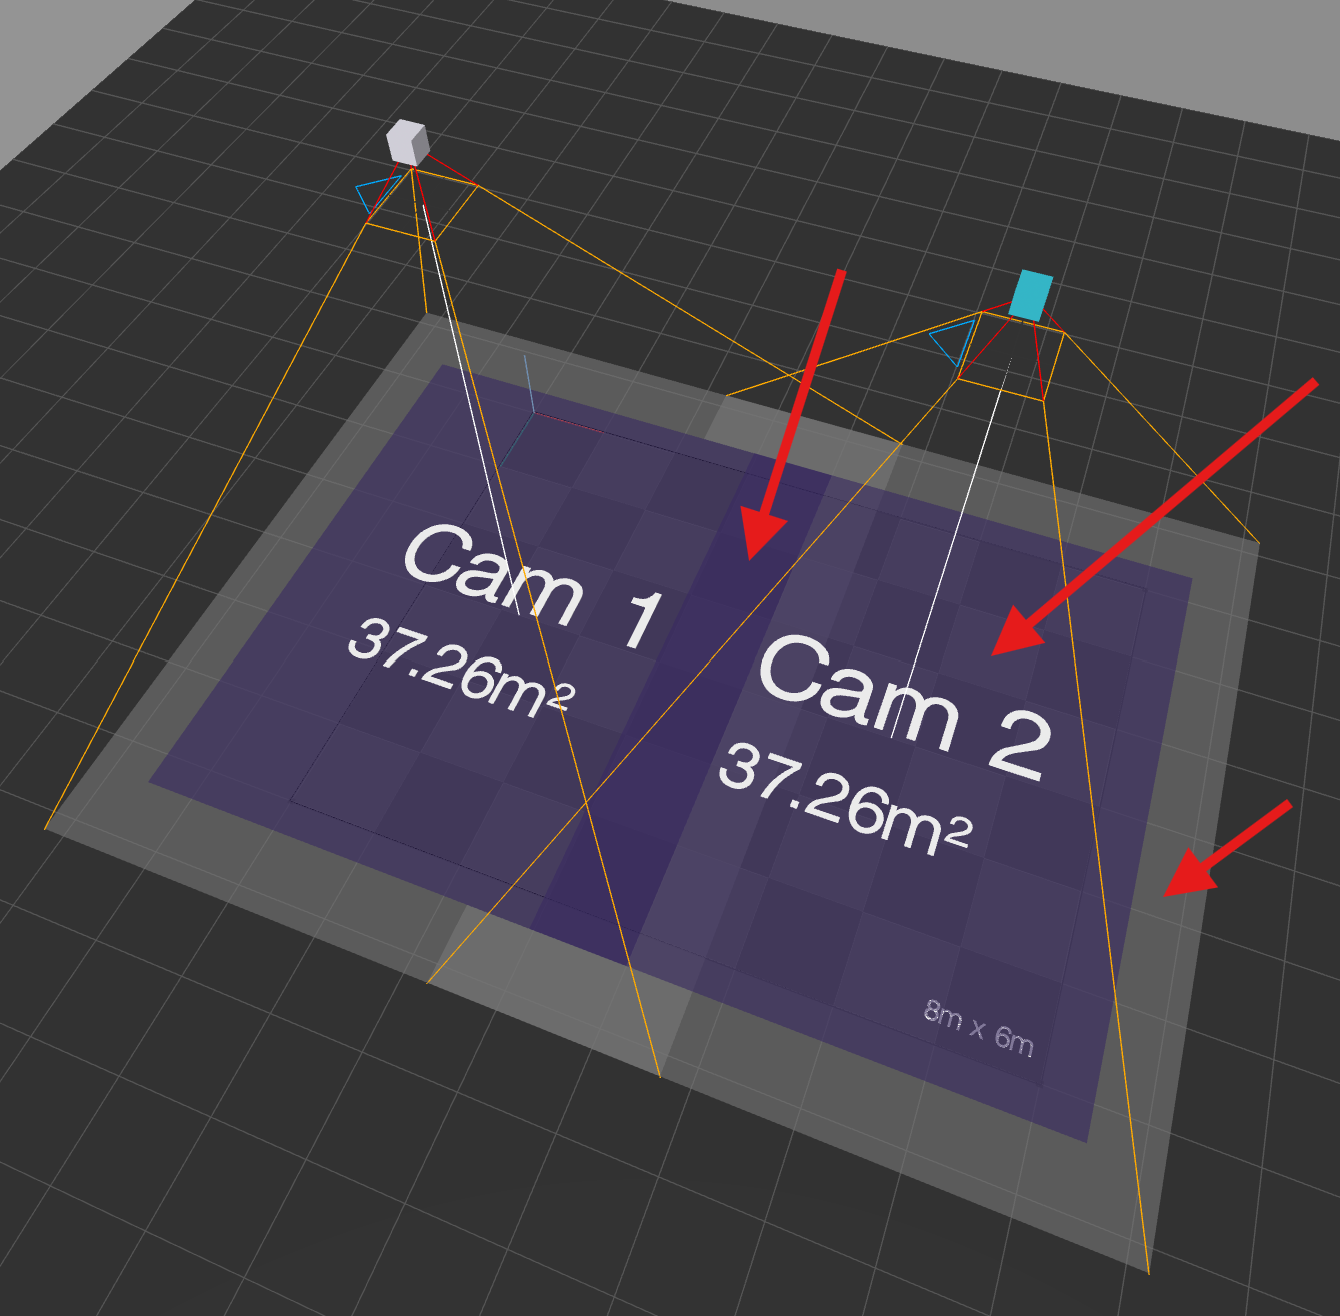
The dark purple area represents the sensor overlap, ensuring continuous tracking when visitors move around the space
The purple area shows the effective tracking zone
The white area indicates insufficient coverage
5. Adjust orientation
Want to optimize your technical study ? Click on the rotation number to set the sensor’s angle precisely.
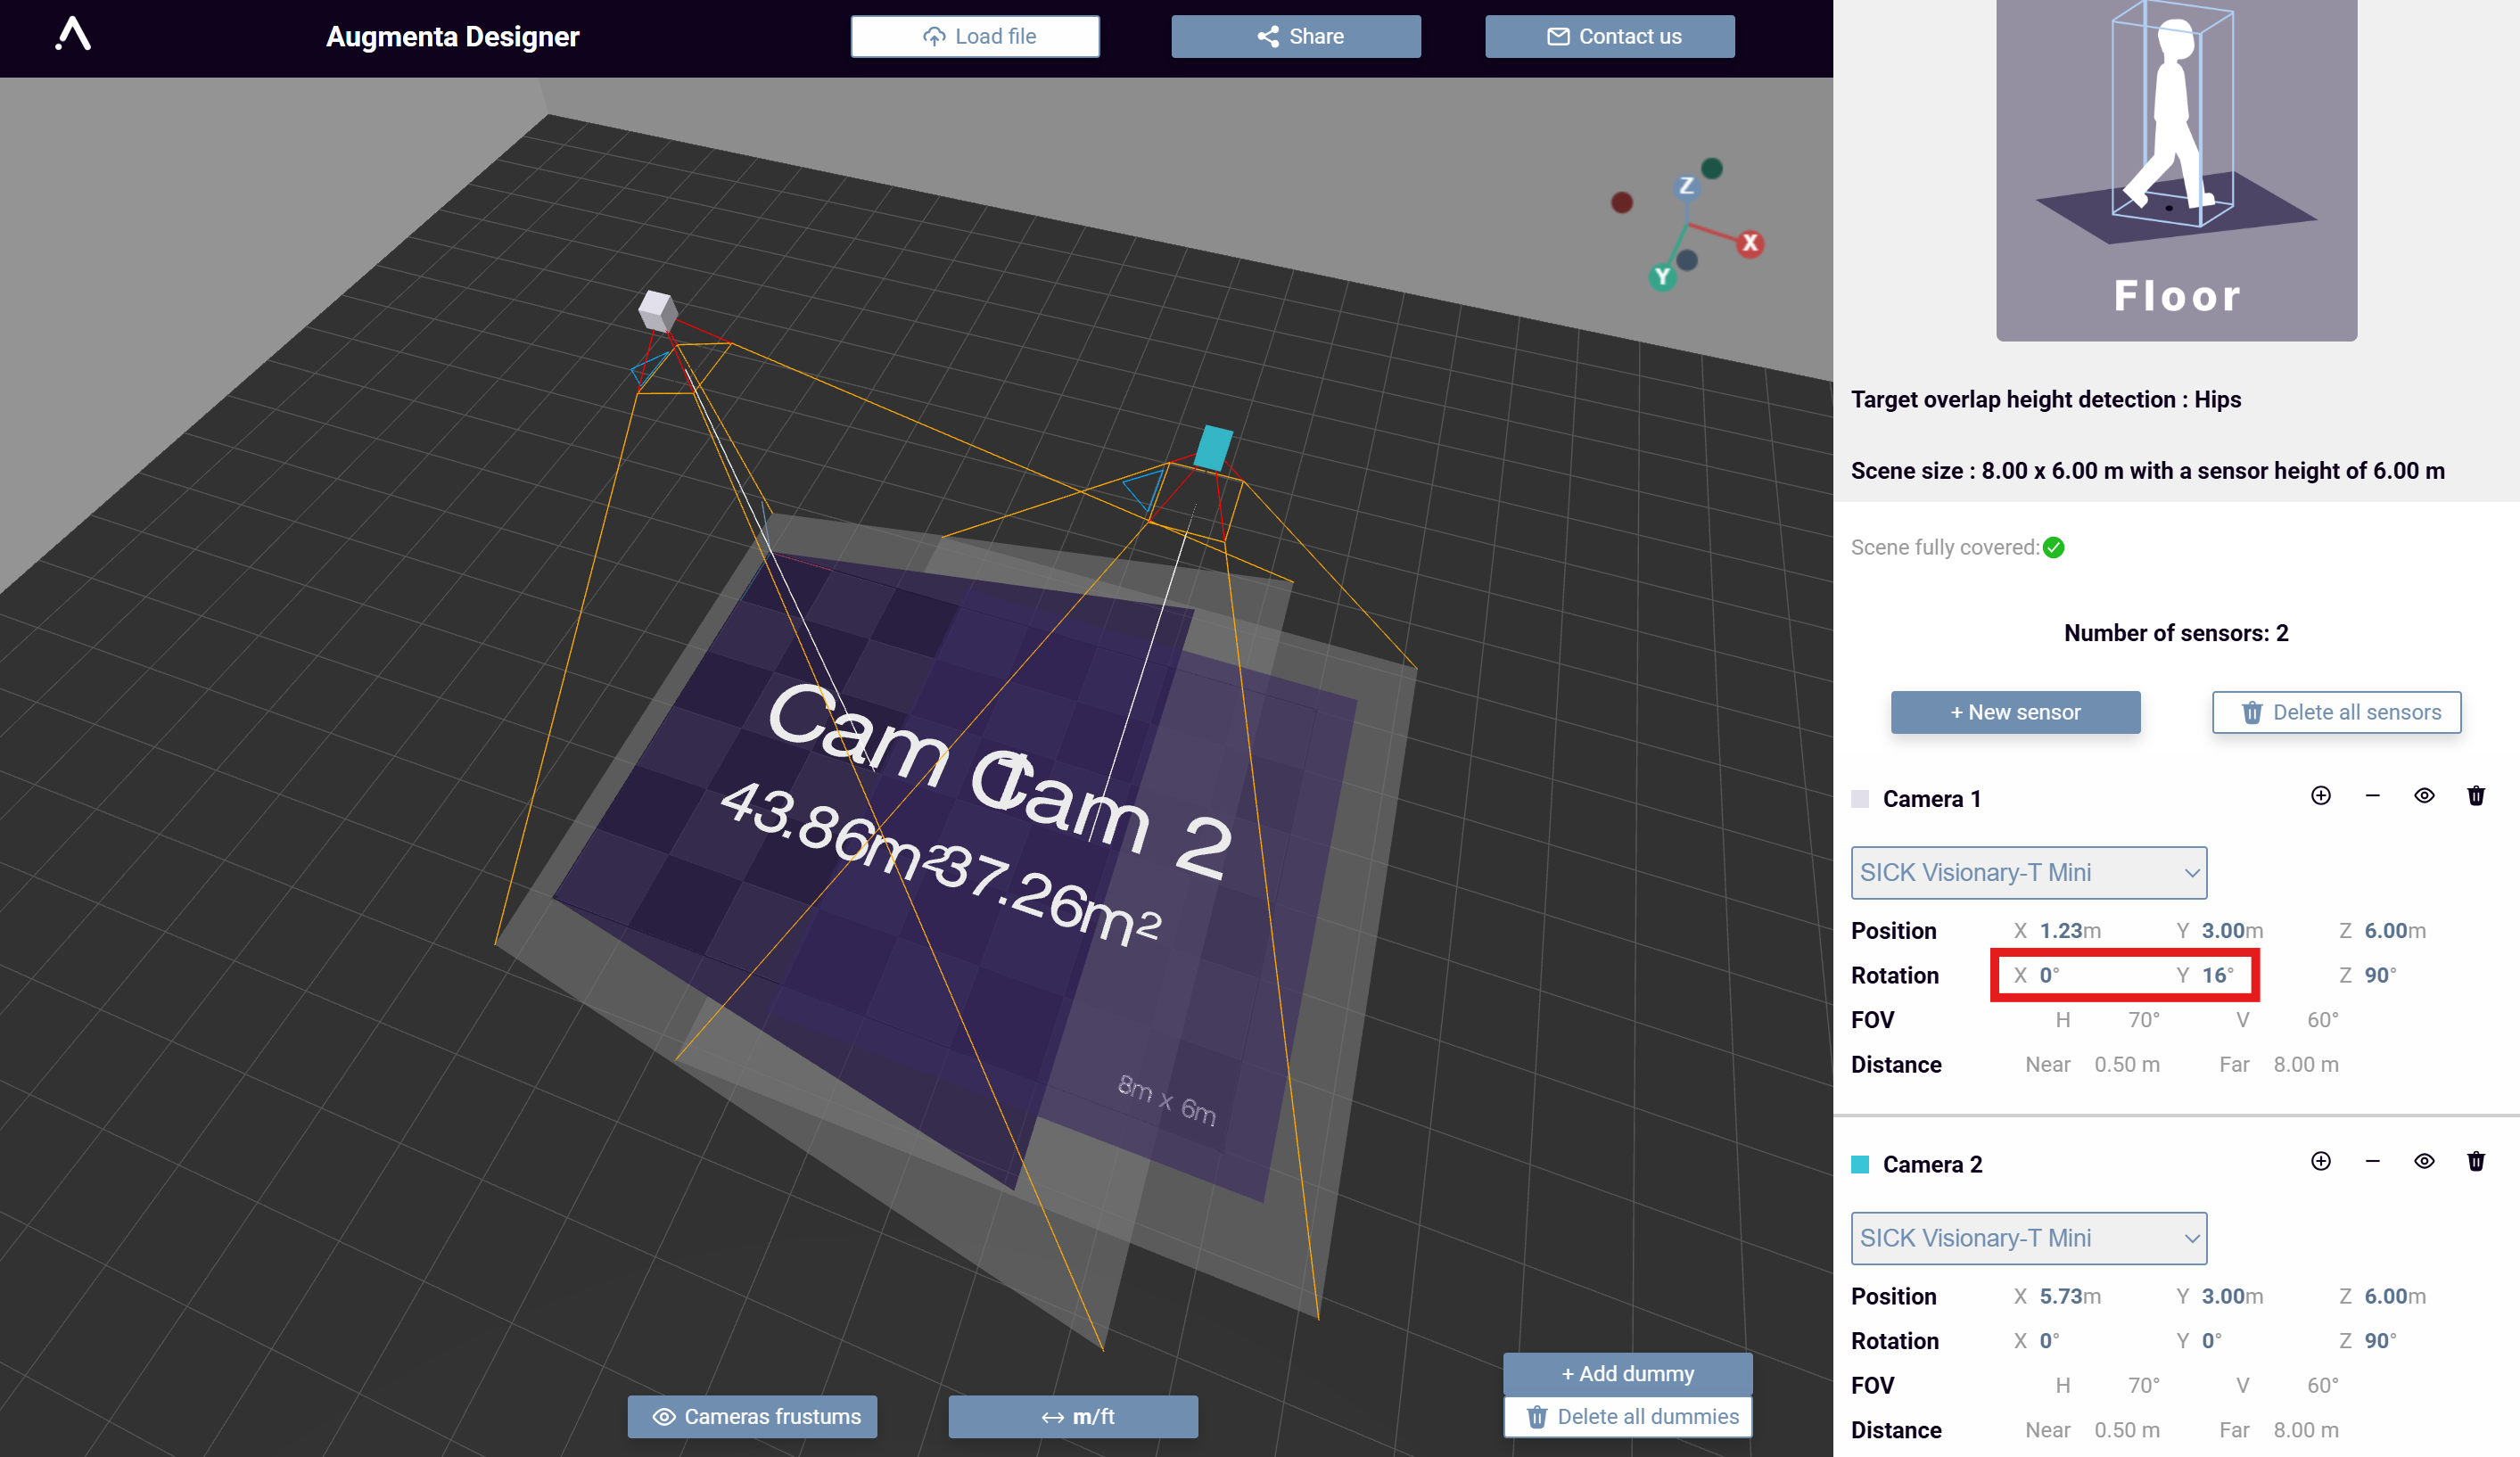
Precise rotation ensures maximum coverage, helps avoid blind spots, and may reduce the number of sensors needed by optimizing each sensor’s field of view.
6. How to add a dummy
You can add dummies (virtual people) to quickly test your setup. They will appear inside the tracking area and help you verify coverage and overlaps.

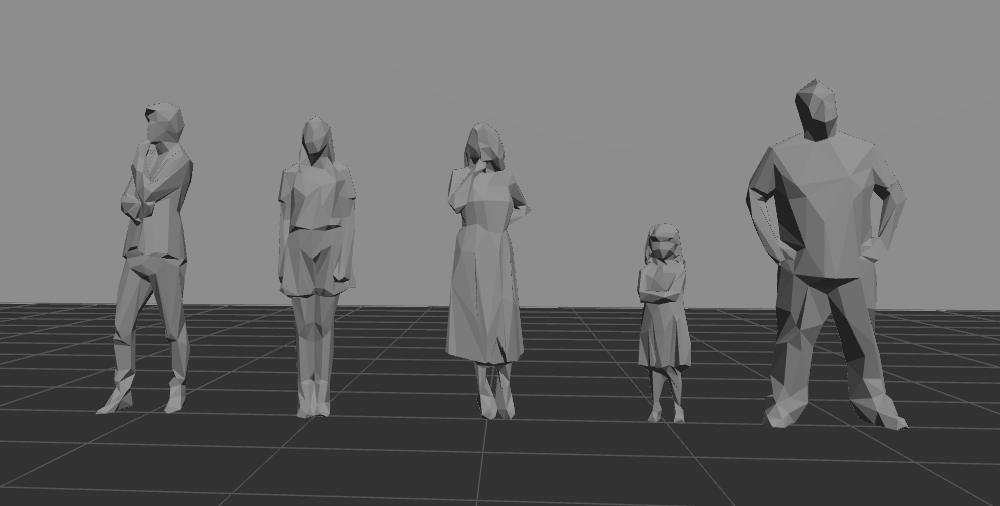
👉 Dummies are generated randomly, they can represent children or adults of varying heights, from 1.20 m up to 2 m (≈ 4 ft to 6 ft 7 in). This allows you to simulate realistic visitor scenarios and ensure consistent tracking for all users.
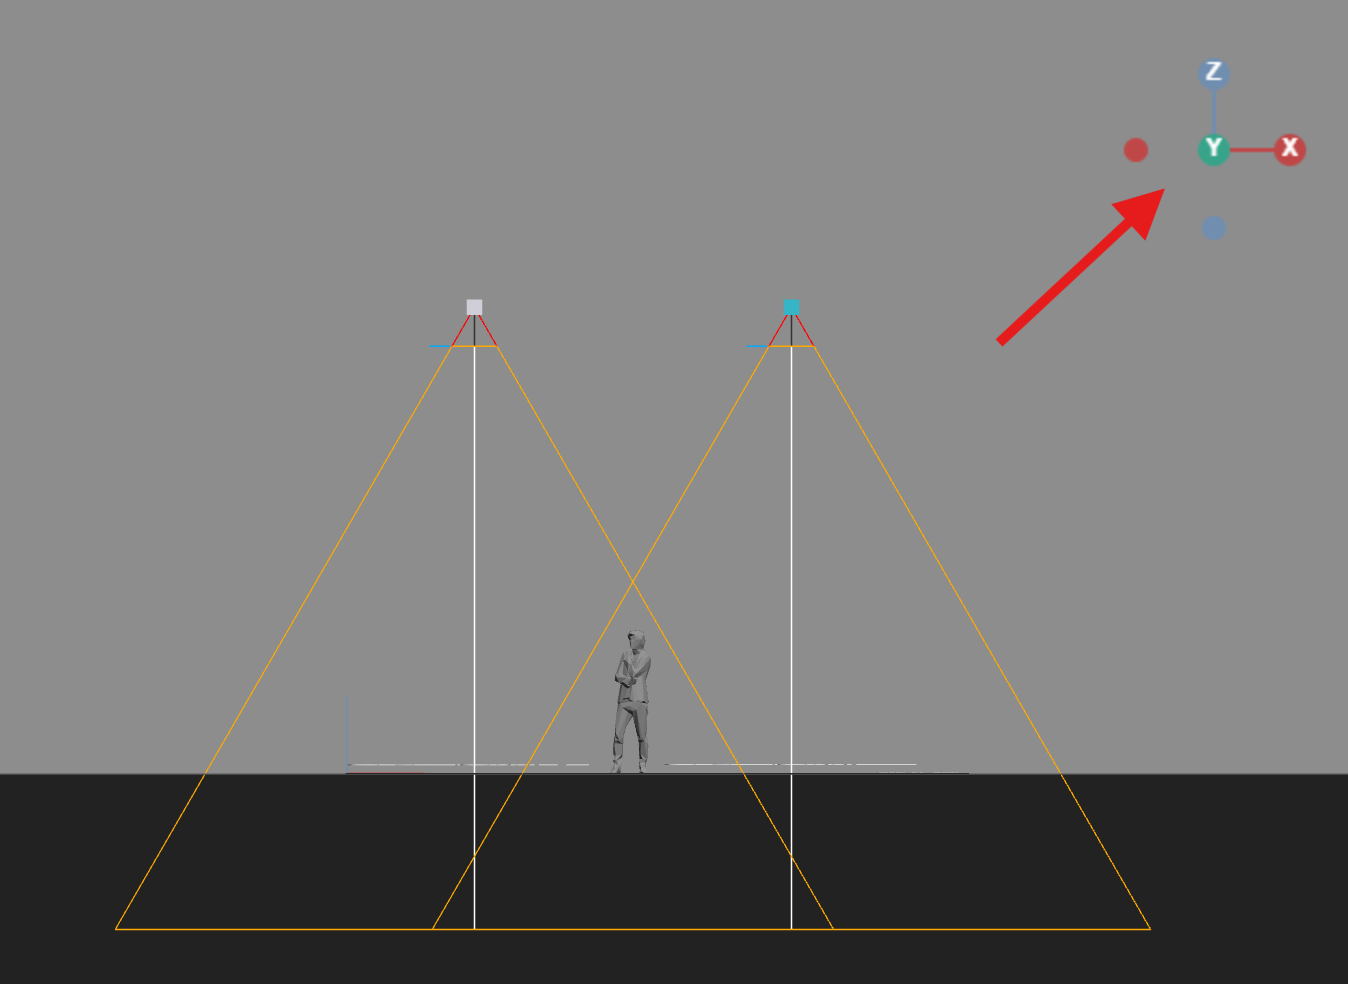
7. Change the view
You can switch to the orthonormal view to better analyze your setup :
- Top-down projection → check sensor coverage, overlaps, and room layout
- Side projection → verify height coverage, overlap at different levels (hips vs. full body), and blind spots for children or tall visitors
Advanced Options
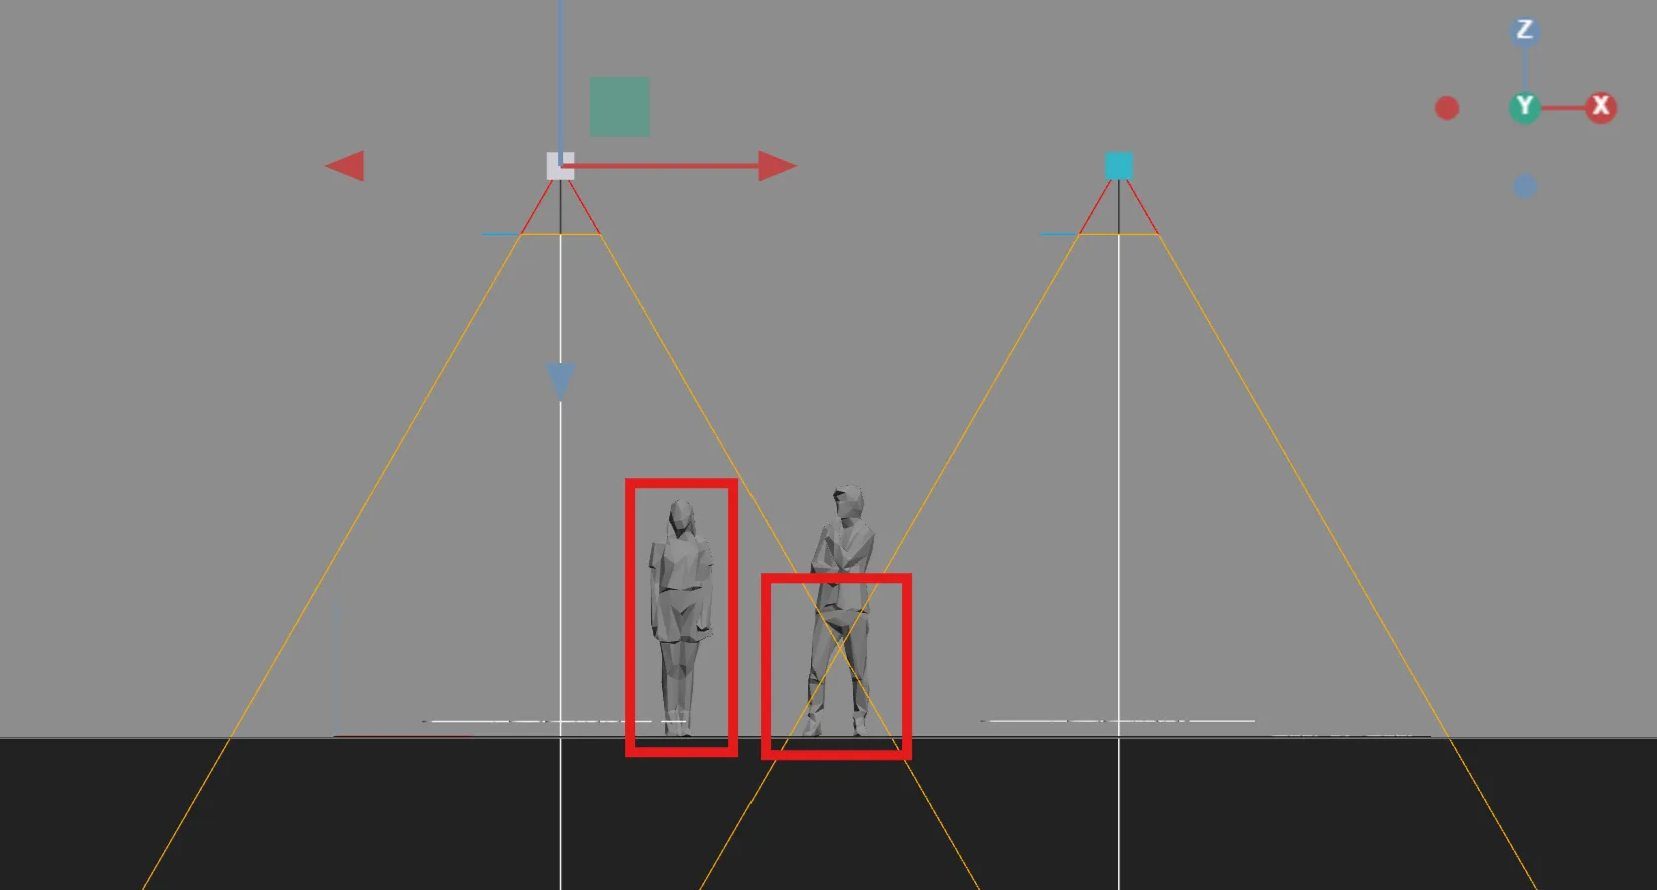
By default, the target overlap is set at hip height.
This ensures sensors always capture “half a person” for reliable detection.
If you need accurate height data (e.g., for full-body tracking / point cloud streaming), make sure sensors overlap at full body height.
Otherwise, height values may appear lower in the overlap zones.
👉 Use the orthonormal view to verify your sensor placement.
How to share

Heads up : This free tool is designed to help you plan your setup, but it may not be 100% accurate
Known limitations : Ouster sensors are not entirely integrated and provided as-is. The purple area has different precision depending on heights that are not currently reflected in the software. This means that the current purple area for this sensor may not contain enough precision for tracking people depending on height, please contact us for a better study or validation.
For complex projects or any questions, please contact our team.