
Download the simulator for Windows here
With the simulator you can
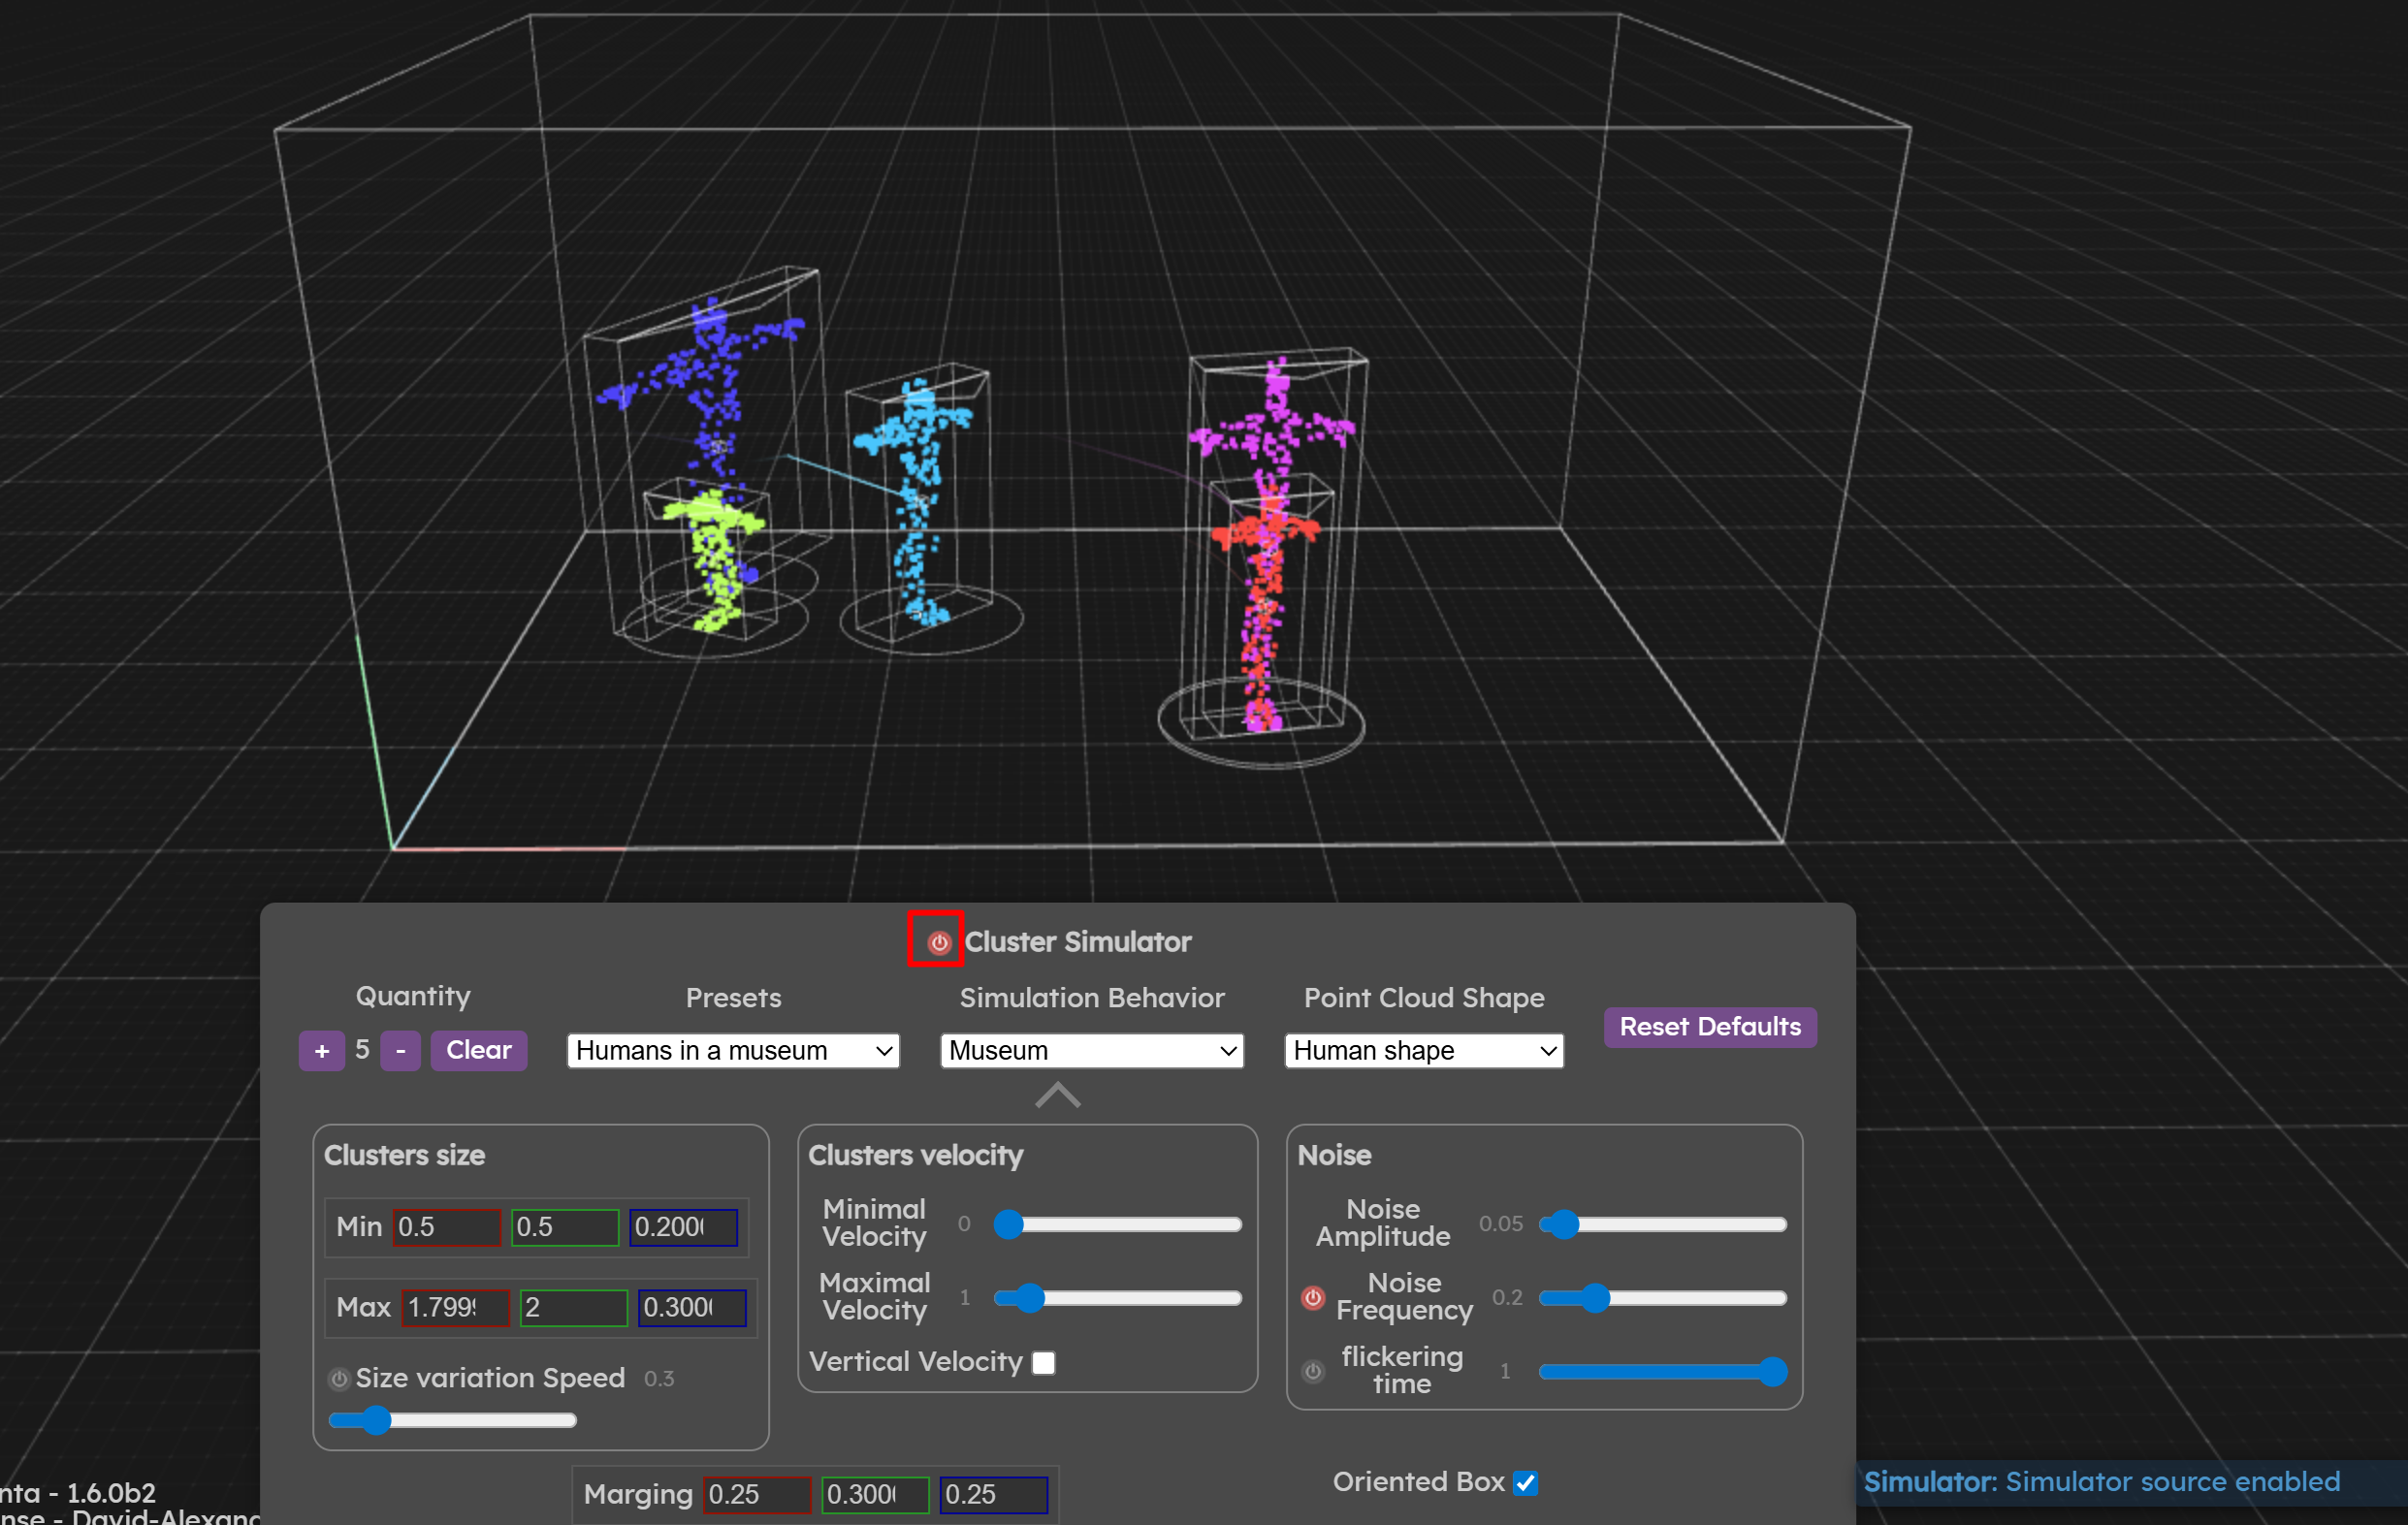
- Generate people & point clouds moving in space
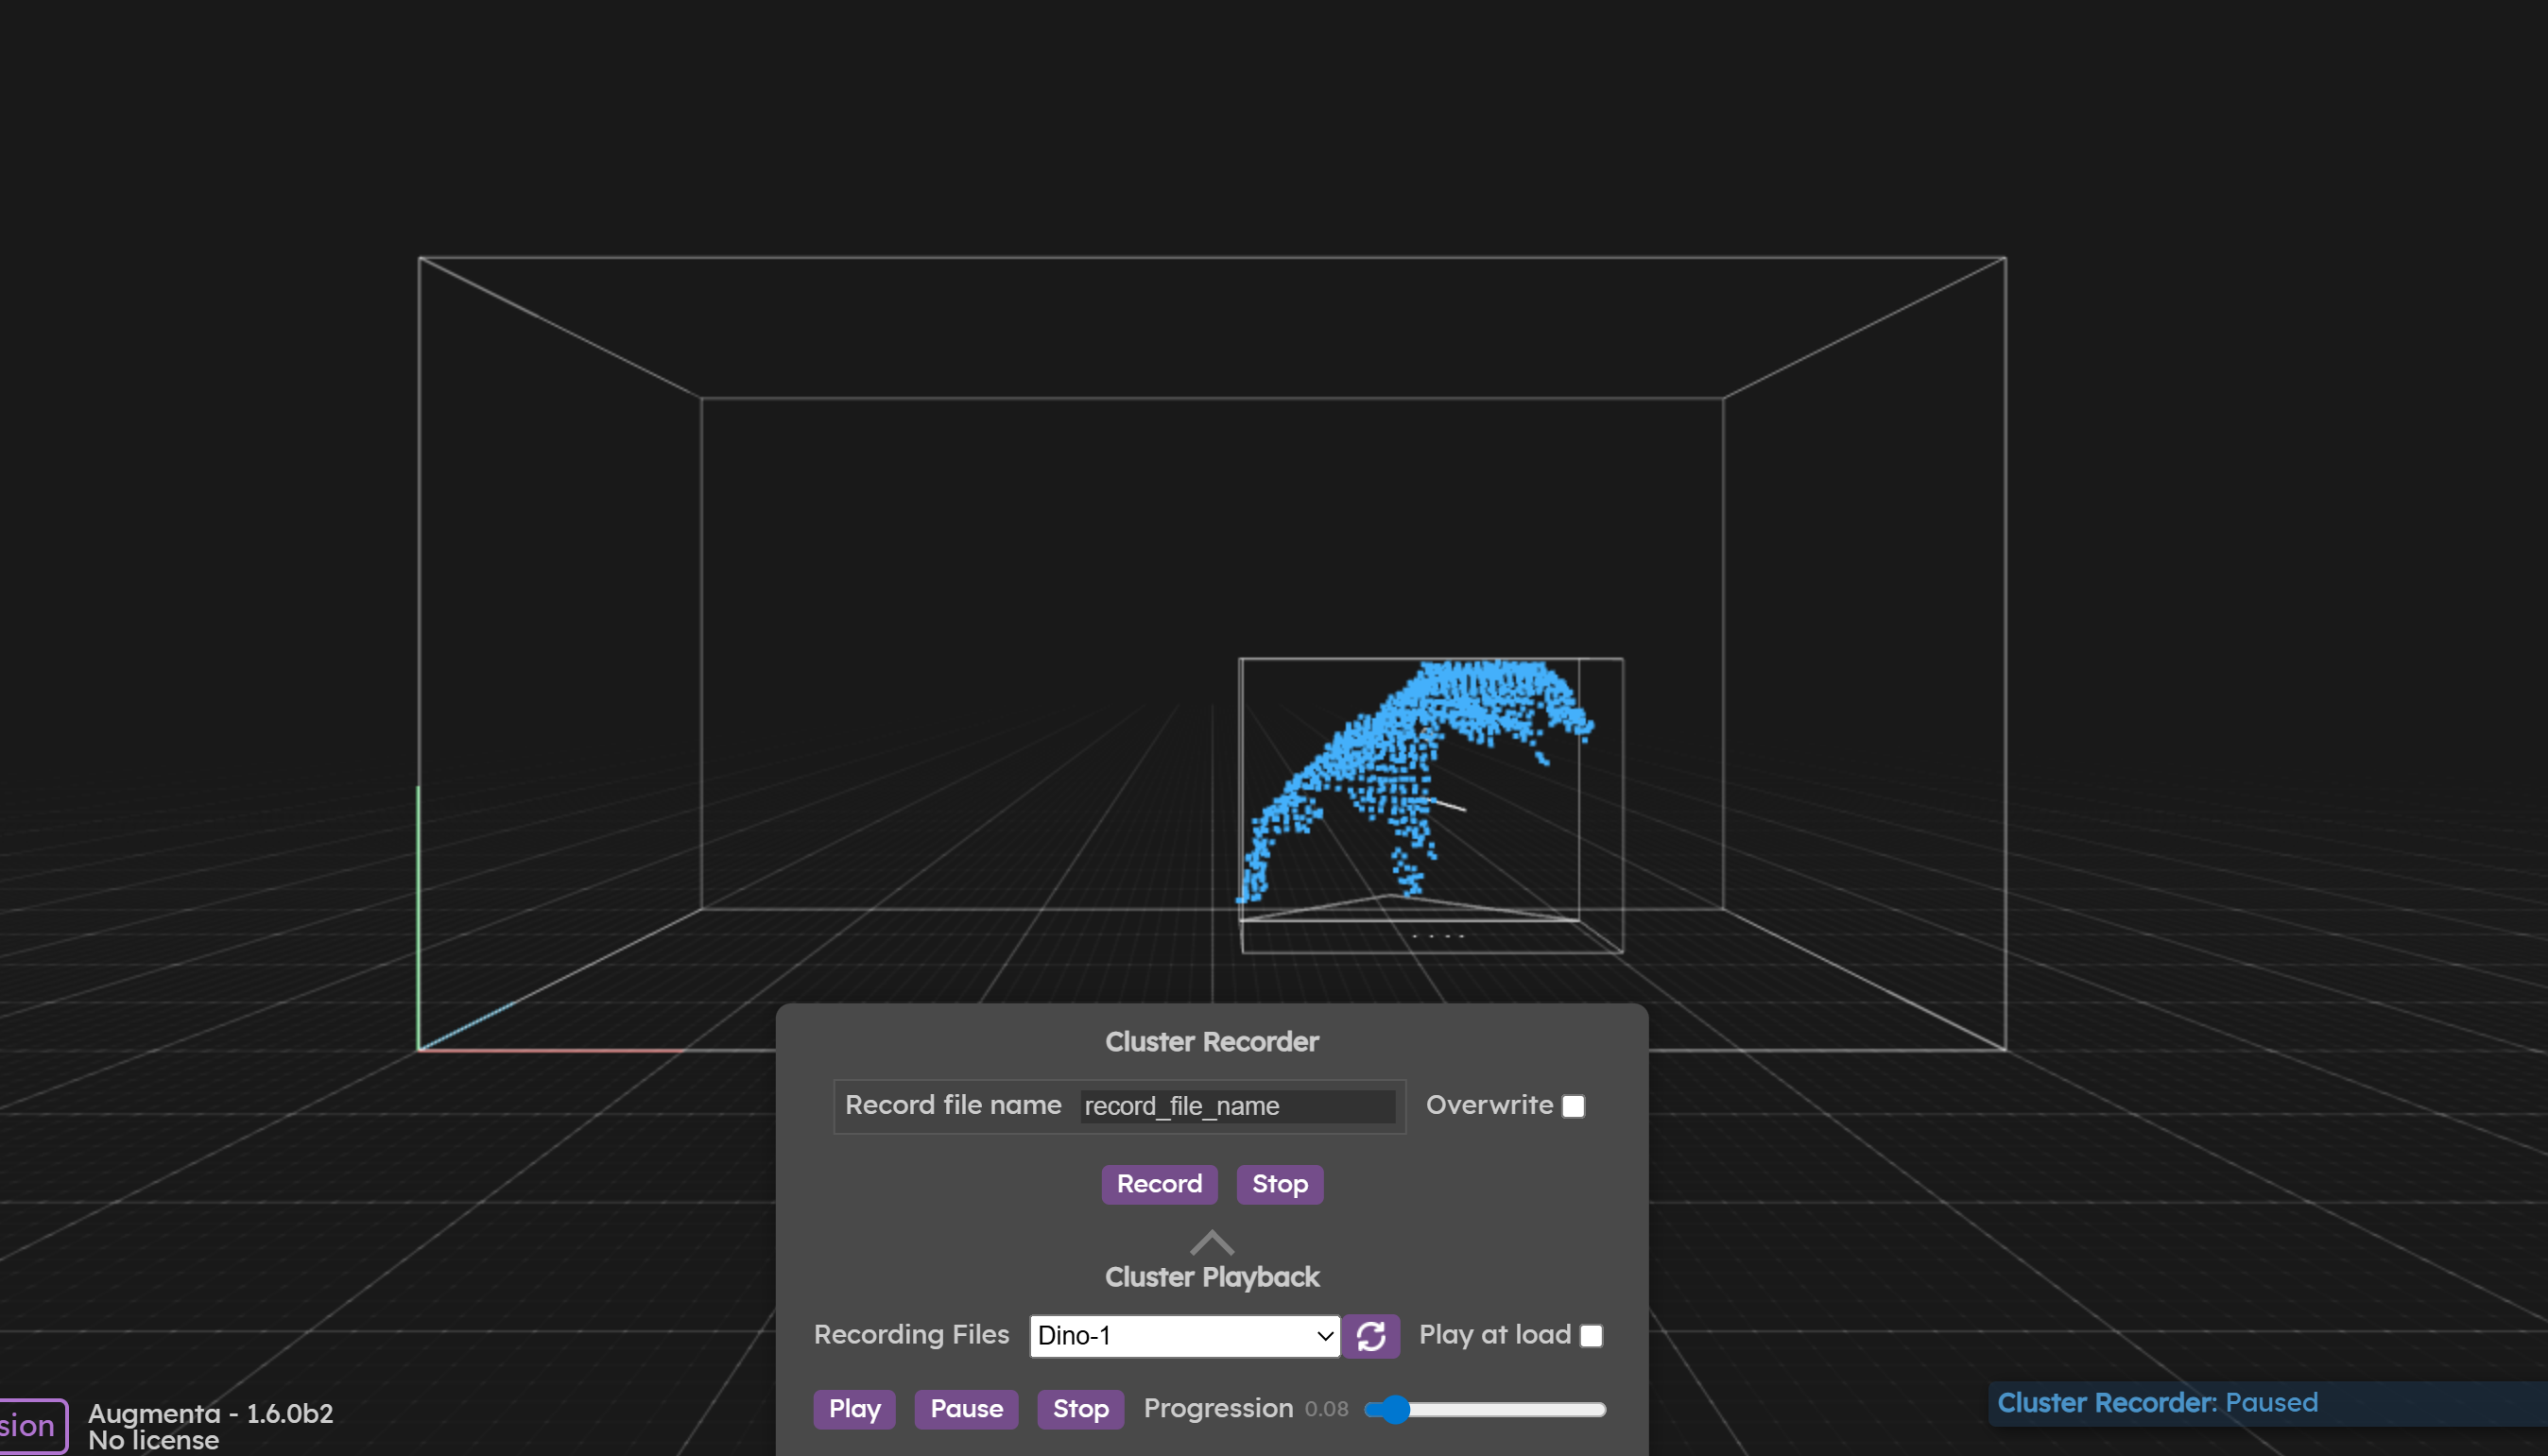
- Play data recordings
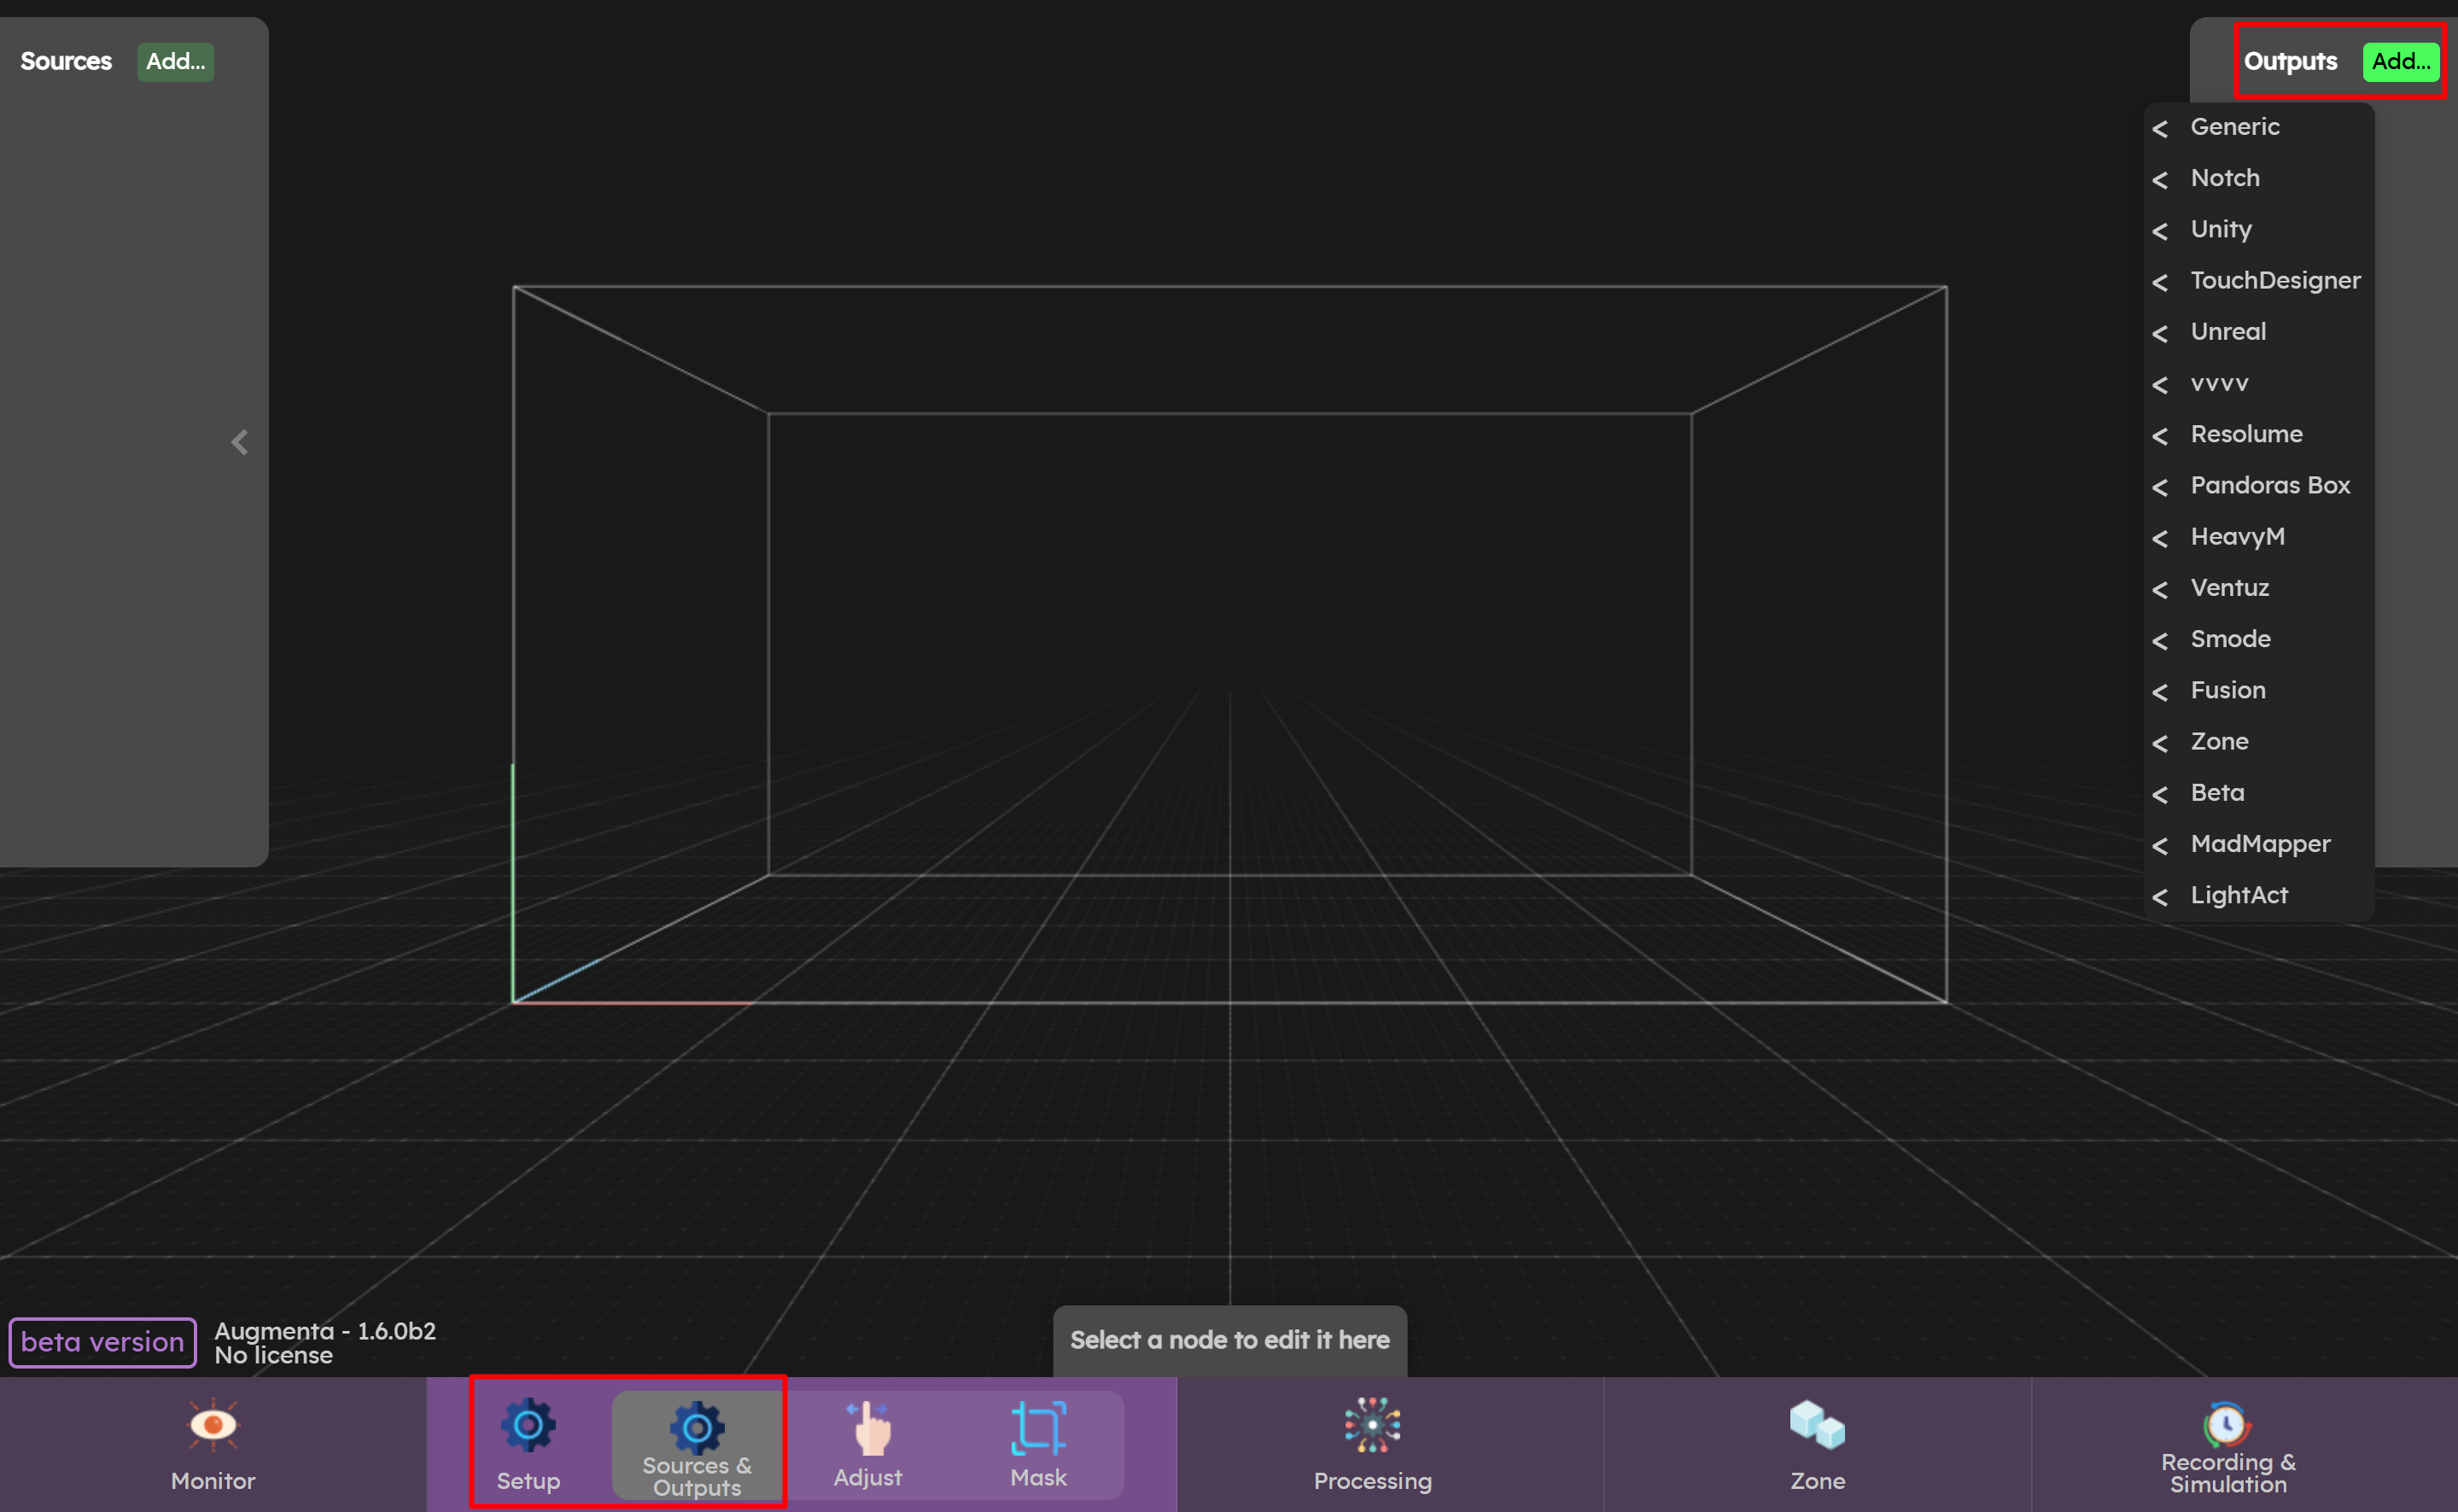
- Send data to your creative software
- Open & prepare a project
Walkthrough video
Features
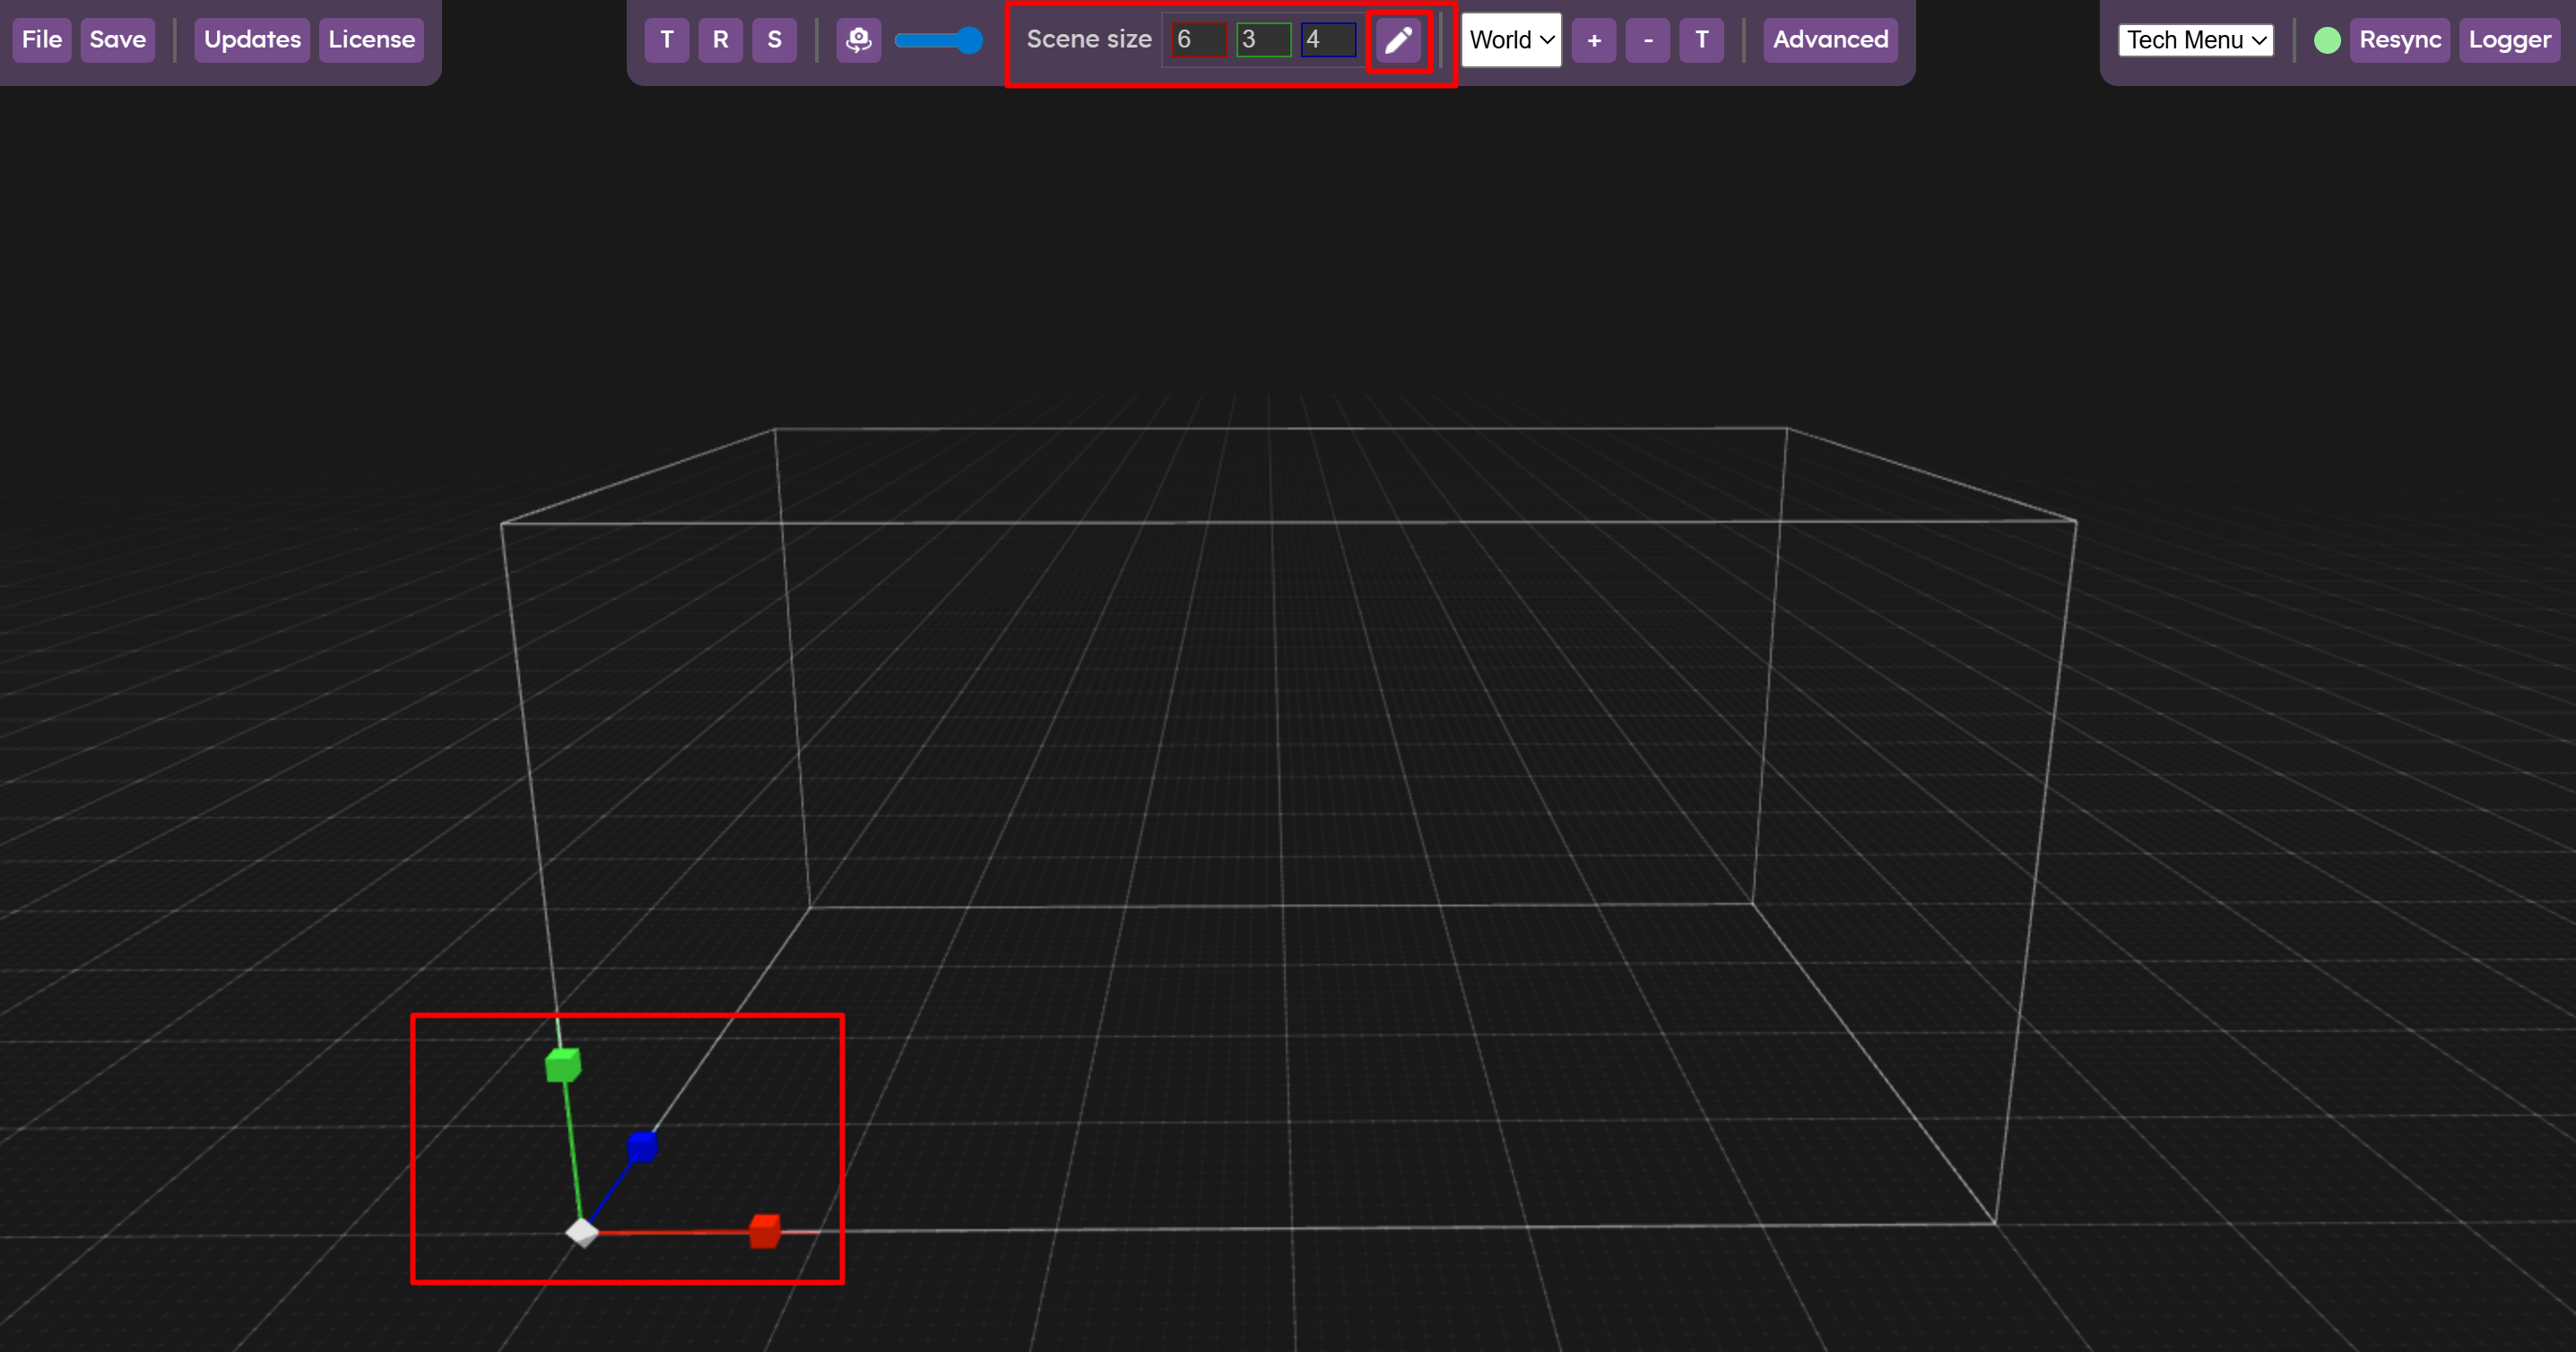
Scene dimensions
Data simulation
Data Playback
Output
Controls
Simulate panel
Mouse
Double click : Create a clusterRight click : Delete a clusterLeft click drag : Move a clusterAll panels
Touch screen
1 finger drag : Move a clusterMouse
Left click : OrbitRight click : MoveScroll wheel : Zoom Keyboard
T : TranslationR : RotationS : Scalec : 2D view (ortho)Ctrl+z : UndoTouch screen
1 finger drag : Orbit2 finger drag : TranslatePinch & zoom : ZoomArchive