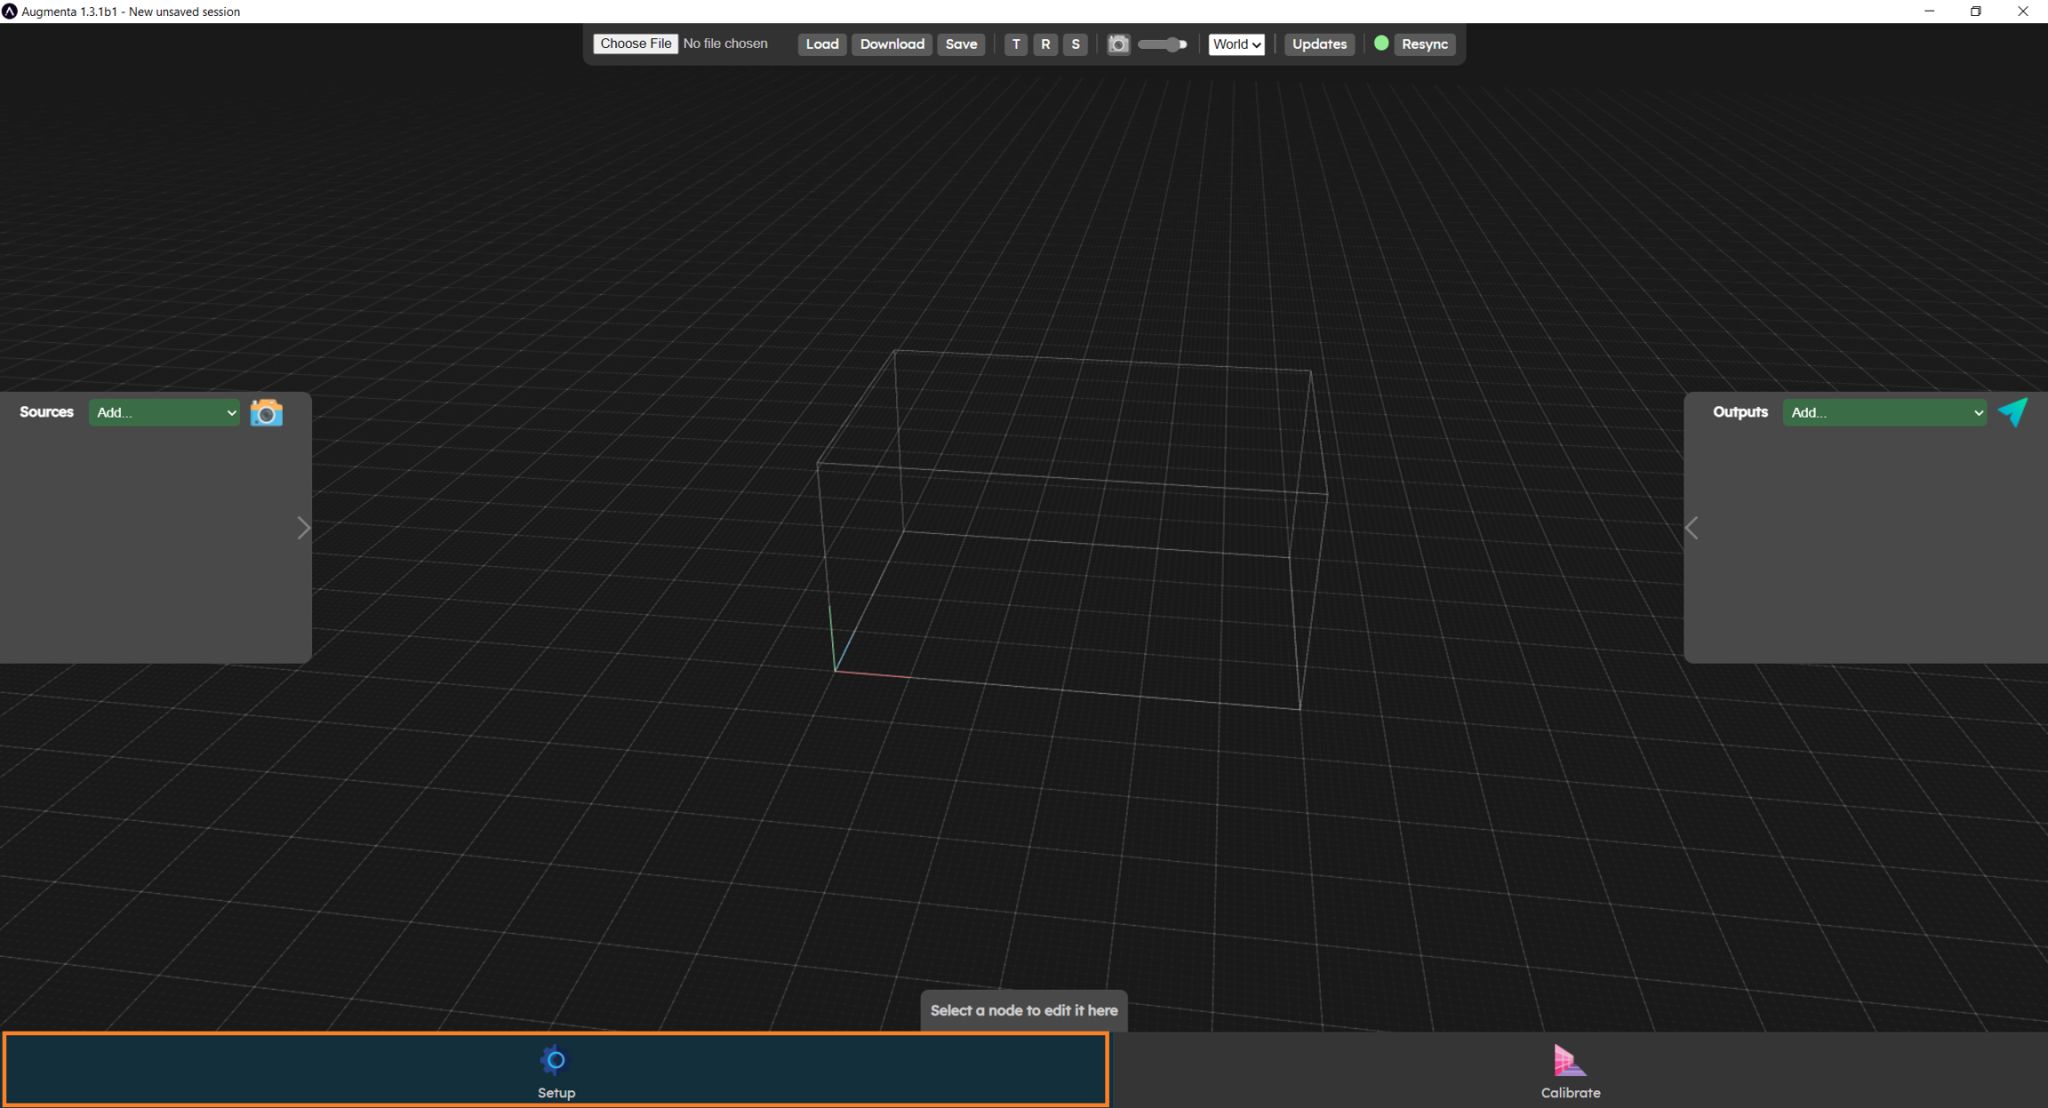
The setup menu lets you configure sources and outputs, displaying the Sources and Outputs panels (left and right).
The green zone is used to manage sources. In this panel, you can add cameras or lidars, configure them and see which are properly connected.
The blue zone lets you manage outputs. In this panel you can add outputs for various protocols and change their parameters.
Setup menu in the web interface
Adding and setting up sources
Sensor configuration
⚠️
Before adding a source, please ensure that your sensor has been correctly initialized. Please refer to the Augmenta server initialization
💡
For a quick check, you can always ping your sensor
Adding it to the active configuration
Add a source in the web interface
To add a source, click on the add drop-down menu in the sources panel. Select the source corresponding to your camera or lidar.
Network source
Enter the IP address of your sensor, then switch the source on (on/off button next to the source name).
Connection status
If the source connects successfully, the socket to the right of the source name will turn green. You'll see (for cameras only) a black-and-white image of what the camera is seeing.
Downsampling parameters
On all sources, you can also set the downsample value, which reduces image and point cloud quality but increases performance. A downsampling of 1 means that we use the whole source's data. A higher downsampling value mean that we are taking more and more data out.
Specific source parameter
Other parameters specific to a source type (such as the depth mode, onboard filters etc...) might be displayed in the bottom panel.
Below is a list of some camera specific filters described:
Visionary-T-Mini filters
The Visionary-T-Mini has builtin filters to have cleaner data before sending it to the Augmenta server.
If you want to use the onboard filters, make sure that the Filter button at the top is enabled. Otherwise any filter parameter you set will not be applied.
The depth mode allows you to downsample the data before it is send. This is an efficient way to reduce the number of points received, to lower the bandwidth usage or in case of performance issues. It is better to use this filter instead of using the generic downsample parameter from the source. Here’s what each value does:
Unbinned → full resolution (512 px x 424 px)
The points are simplified by groups of 4 → half resolution (256 px x 212 px)
The points are simplified by groups of 4 → quarter resolution (128 px x 106)
The edge correction filter can improve the accuracy of object edges, but can create some artifacts. It is better to start without this option enabled.
The distance filters allows to reject any points outside of the specified range. The two values are a distance in millimeters for the near and far spheres used to crop the data.
The two most effective filters to try out first for cleaning data will be “isolated pixel filter” and “remission filter”, in this order
The isolated pixel filter, start with a value of 500 and work you way down. This filter is good for removing noisy points flying around. The value of this filter is a distance in millimeters that is used to check for each pixel to check for the number of neighbours. If it has enough neighbours the pixel is kept. So a lower value will find less neighbour pixels and be more aggressive. This filter is kind of similar to the Outlier removal filter from the Augmenta filters menu.
The remission filter, adjust the lowest value, the lower the value is, the more points it will let through. This filter is based on the intensity of IR light for each point that came back to the camera. So darker materials / surfaces will disappear while you increase the lowest value of this filter. This filter has the advantage of taking into account the distance, so the filtering result is in some way independent from the distance of the points (as farther points always have a lower intensity, this filter tries to compensate this effect).
Other less commonly used filters are also available:
The intensity filter allows to filter on pure intensity. This filter is less smart than the remission filter so it is better to used the other one before trying this one out.
The ambiguity filter can be used to deal with noise in the corners of rooms or due to IR light rebounds.
Adding and setting up outputs
Presets and plugins have already been created for each software, you can check them and download the examples in the Integration documentation
Add an output in web interface
To add an output, click on the add drop-down menu in the output panel. Select the output with the preset you need.
Enter the IP address of the computer to which you want the data to be sent, and the port on which the software receiving the data is listening. Depending on the output protocol and preset selected, other parameters are available.
The "creative software" presets that exist for each protocol are tailored to work with the plugins and examples we provide.
Video walkthrough
This videos shows how to add and configure sources and outputs:

 Augmenta server initialization

 Calibrate panel