
How to use Notch in Pandora’s Box Media Server
You can play Notch blocks in Pandoras (licence needed).
In the Notch Builder, you first design your scene and then decide which parameters should be exposed in the so called Notch block that will be loaded in Pandoras Box. The exposed parameters can be everything from text, amount, color, to size or position etc. If you program items to the Notch timeline, they will be synchronized to the PB timeline when storing them as a container.
Learn more about how to use Notch layers in Pandoras Box here, and a video tutorial here, or follow our quick start tutorial right below.
Quick start
Download the Notch block example :  Use Augmenta with Notch block integrations
Use Augmenta with Notch block integrations Prerequisites
- Having Pandoras Box installed on your computer and licensed
- Having a Notch Builder licence
- Having a Notch block to import into Pandoras Box
- You can download our Notch example block here.
- Having Augmenta simulator installed on your computer
OR
- Having an Augmenta (node or server), either running on your machine or on our hardware, connected to your machine.
First steps
- Open your Augmenta version (simulator, node or server)
- Make sure you have data to send from Augmenta, by connecting a sensor or enable a simulator
- Create a “Pandoras Box/TUIO” output in Augmenta with these settings :
- IP : 127.0.0.1 (if you are running Pandoras Box on the same machine)
- TUIO port : 2235
- Output scene : 2234

- Open your Notch file or use our example file, and make sure the TUIO settings matches your Augmenta output, so the two can communicate data.
- Go to the top menu “Project > Settings” and go to “Protocol” tab in the popup window.
- Setup the TUIO port to 2235

- When you hit Notch’s play button, you should see your content reacting to data sent from Augmenta
- (Optionnal, already done for “Luminosity” in our Notch example file) use Augmenta’s data to drive your content.
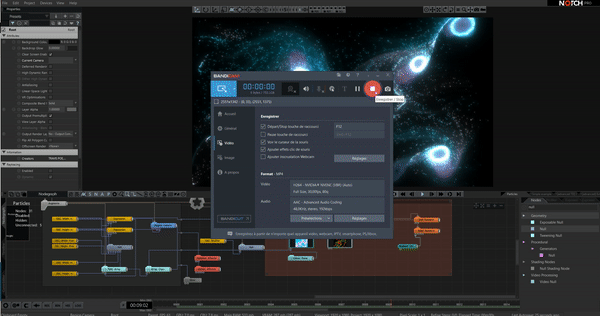
- In your Notch file, select any node that you want to control in Pandoras Box :
- Click on the Node you want to control
- In the Property tab, click on the property you want to control
- In the Property pop-up window, check “Expose property” and hit OK
- Once done setting up your project on Notch, select the “Project” menu at the top of the window, click “Compile Block for Media Server …”, give your block a name, hit ok and let it compile.
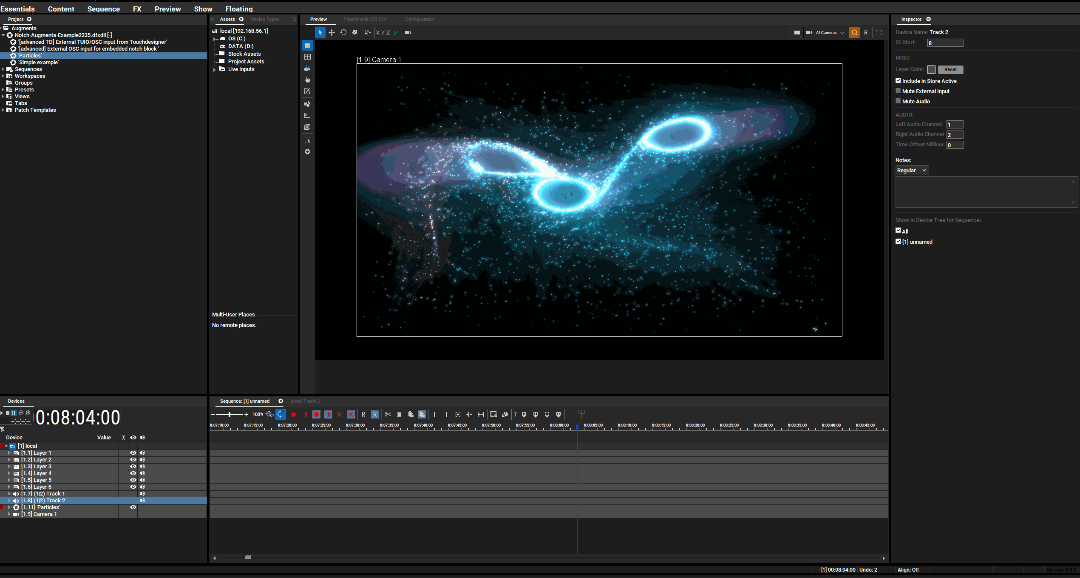
- Open Pandoras Box on your computer
- If you have a PB system with a licence on your machine, Pandoras Box Master will find it, and you will be able to import any Notch block.
Importing a Notch block to Pandoras Box
Create a new Pandoras Box project. Then add your Notch block :
- Browse and select your example dfxdll file in the “Assets” tab, drag it to the “Project” tab.
- Wait for it to load
- Now you can drag any sub resource from your dfxdll file onto a Site in the Device tree, wich will create a new Notch layer.
Alternative method to add a Notch block to your Site :
- In your Pandoras Box project, right click on a Site an choose :
- Add Device > Notch Layer > loaded Notch block > custom Notch layer (as shown below)

- Assign the Notch content from the Project tab to your newly created layer manually
More informations and details on importing and working with Notch Layers on Pandoras Box documentation here.
You can now play with the properties parameters of the Notch Block directly inside Pandoras Box.